Pork ribs are a summertime favorite for get-togethers with friends or even just for when you feel like spoiling yourself or the family. While ribs are spectacular on their own, when you’ve got the perfect pork rib sides to complete the meal then you’ve really got a day (and a feast) to remember!
To help, we’ve compiled 12 delicious sides to tempt your tummy and pair perfectly with your delicious pork ribs. There’s a little something for everyone, so if you’re ready, then let’s take a look at the perfect pork rib sides for celebrating your summer!
Perfect Pork Rib Sides – Let’s get to the goods!

To help ensure that we’ve got something to tempt even the most finicky palates out there, we’ve divided up our sides into ‘Hearty sides and snacks’ and ‘Classic Salad sides’. Take a look and see what you think – these pork rib sides will definitely keep you coming back for more!
Pork sides: Hearty sides and snacks
Garlic Red Skin Mashed Potatoes

You can’t have bbq ribs without mashed potatoes – it just wouldn’t be right – and this recipe from Angela at Bake it with Love is a real doozy. With roasted garlic and cream cheese in it, you won’t even need gravy, so let’s take a look at how to whip some up as a perfect side dish for your bbq ribs!
Ingredients to make 8 servings:
- ¼ cup salted butter (about ½ a stick)
- ¼ tsp salt & pepper (to taste)
- ½ cup heavy cream
- 2 ½ lbs red potatoes
- 4 cups water (or chicken stock)
- 4 cloves roasted garlic
- 4 oz cream cheese
Directions:
- Wash your potatoes well and then we want to cube them – leaving on the skin – so that your pieces are all 1 to 1 ½ inches in size.
- Put those potatoes in a stock pot and you can add salted water up to the point that they are covered, or you can go with chicken broth for some extra flavor – your call.
- Bring it to a nice, roiling boil within about 10 minutes when they are tender, then go ahead and drain the potatoes well and return them to your pot.
- Mash up your potatoes first, then add your mashed roasted garlic cloves, along with the cream cheese, salt, pepper, and of course, your butter!
- Stir it up well, to the point that your butter and cream cheese are good and melted, and then add in your heavy cream. Do this slowly, while stirring, until you get the texture that you prefer.
Instant Pot Baked Beans – No soaking required!
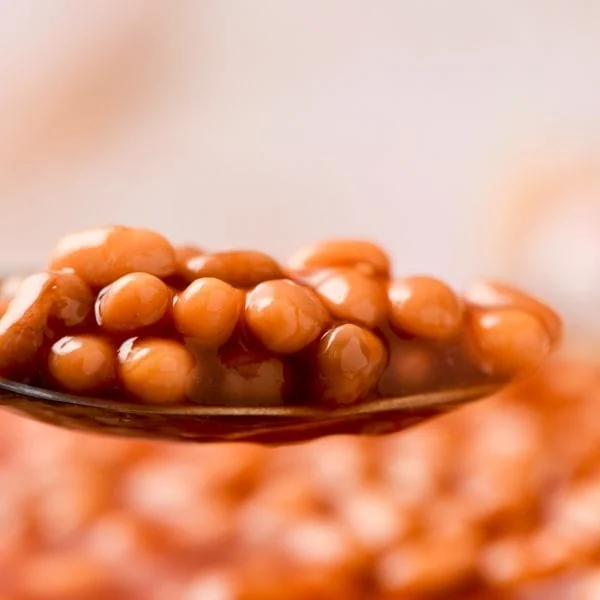
When you factor in the overnight soaking of beans, prep, and actual cook time, this classic and delicious dish can often seem like a chore – but it doesn’t have to be if you’ve got an Instant Pot pressure cooker! So, dust off that cooker or pull it out of storage, because this Instant Pot Baked Beans recipe from ‘The Typical Mom’ at Temecula Blogs is the pork ribs side that you need without all of that lengthy prep nonsense!
Check out the ingredients and steps below and you’ll see why we picked this one – it’s a guaranteed people-pleaser.
Ingredients:
- 1/2 tsp salt
- 1/2 tsp garlic salt
- 1/2 tsp chili powder
- 1/2 cup brown sugar packed
- 3/4 cup ketchup
- 1 onion diced
- 3/4 cup molasses
- 1 and ½ tsp dry mustard
- 1 and 1/2 tbsp white wine vinegar
- 1 and 1/2 tbsp Worcestershire Sauce
- 6 cup water
- 8 pieces of diced bacon
- 16 oz. pinto beans dry, rinsed
- Olive oil
Directions:
- While you won’t need to soak them, we’ll start off by giving your beans a good rinse, and then you’ll need to put them into your pressure cooker with 1 tsp of salt and about 6 cups of water.
- Pop the lid onto your Instant Pot and go ahead and close the steam valve, and push the handy ‘bean’ button so that we can give these beans a preliminary 60-minute cook.
- At the end of 60 minutes, let’s do a careful pressure release and with some gloves on, lift your lid slowly, and then we’ll want to drain the water from the beans and put them aside for now.
- In a large mixing bowl, combine all of the ingredients, except for your onions, bacon, and olive oil. Mix them up well and set the bowl off to the side for now.
- Dice your onions and bacon and these are ready to go into your Instant Pot along with a few tablespoons of olive oil. Put the sauté setting on and cook them until your onions soften. Turn your Instant Pot off and scrape the bacon off the bottom so that it doesn’t give you a ‘burn’ notice on the unit, and then add your beans to the pot with your onions and bacon.
- Get our mixer bowl with the sauce ingredients, give it a good whisk so that the sugar mixes properly, and pour it evenly around in your beans and stir carefully to mix to perfection.
- Put the lid on your Instant Pot, tap the ‘bean’ button, and let it cook for 30 minutes or a little longer if you like your beans super-soft.
- Perform a ‘natural release’ and carefully remove the lid. You can serve your beans right away, or if you want the sauce to be extra thick, then Saute them for an extra 4 -5 minutes and let them sit for 10 minutes for the sauce to thicken. Congratulations, your Instant Pot Baked Beans are ready to go. Just leave them in your Instant Pot to keep them nice and warm and enjoy the beany goodness!
Air Fried Zucchini Fries with Lemon Tarragon Aioli
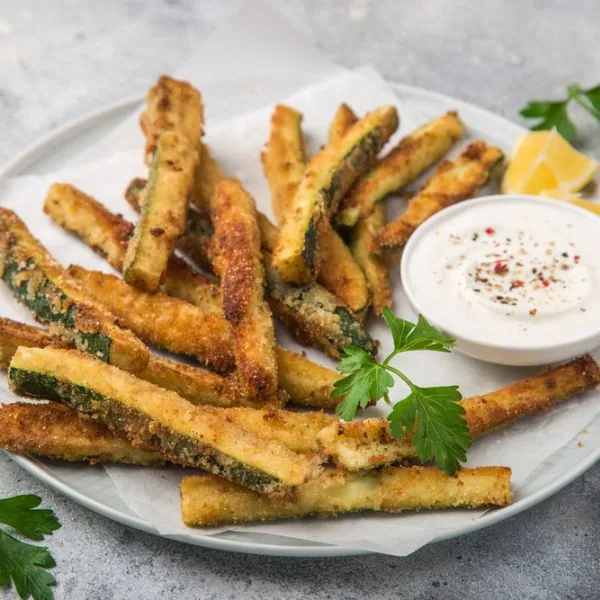
Zucchini fries are delicious, but the problem is getting them crispy. Thankfully, this recipe from Platings and Pairings has found a way to make Zucchini fries that have a perfect crunch by taking advantage of a wondrous kitchen appliance – your air fryer. The recipe takes 15 minutes to prepare and 10 minutes to cook and you’ve never seen Zucchini disappear so fast in your life.
Read on and we’ll tell you how it’s done:
Ingredients to serve 6:
- 1/4 cup parmesan cheese
- 1/2 cup flour
- 1/2 cup panko bread crumbs
- 1/2 cup Italian bread crumbs
- 1 Tbsp extra virgin olive oil
- Kosher salt and fresh-ground black pepper (to taste)
- 2 medium zucchinis
- 3 eggs
Sauce:
- 1/2 cup canola oil
- 1 egg
- 1 tbsp lemon juice
- 1 tsp lemon zest
- 2 cloves garlic (minced)
- 2 Tbsp fresh tarragon leaves (minced)
- Kosher salt and fresh-ground black pepper (to taste)
Directions:
- Start off by cutting your zucchini so that you have sticks that are 3 inches long and half an inch thick.
- Get three shallow mixing bowls – one for your flour, one to whisk your egg with the salt and pepper, and a third to mix your bread crumbs, panko, olive oil, and parmesan cheese.
- Preheat your Air Fryer to 400 degrees and start dipping your zucchini in the bowls – first the flour, then the egg, then your cheesy crumb mix.
- Load a single layer of zucchini fries into your air fryer and cook for 8 – 10 minutes to desired crispness. Add a little kosher salt while it’s warm and they’re just about perfect.
While your first batch of fries is cooking, mix up your sauce ingredients by loading your egg, lemon juice, and garlic into a food processor or blender. Keep the motor running and slowly add your canola until it emulsifies.
At this point, you can add in your tarragon, lemon zest, and a little salt and pepper to taste. Serve this up with your fries and you’ve got a healthy veggie fried up perfectly and ready to pair with your pork
Southern Baked Mac and Cheese

No pork ribs would be complete without the traditional companion of classic mac and cheese and this Southern Baked Mac and Cheese from Angela at Bake It With Love can do the job perfectly. Take a look and see what you think – it’s not complicated, but with all that cheese and just enough spice to keep things interesting, this is sure to be a new home favorite for your pork ribs and more!
Ingredients to serve 10:
- ½ teaspoon each salt & pepper
- ½ tsp cayenne pepper
- 1 tsp garlic powder
- 1 tsp onion powder
- 1 cup whole milk
- 1 cup heavy cream
- 1 cup shredded Colby Jack cheese
- 2 large eggs
- 2 cups shredded sharp cheddar cheese
- 3 cups uncooked elbow macaroni
- 4 oz American cheese (or more, your call!)
Directions:
- Using butter or your favorite non-stick cooking spray, grease up a 9 x 13 baking dish and preheat your oven to 350 degrees
- Cook your macaroni noodles as you would normally (per box instructions or good ol’ experience), but take them out 2 minutes early – this will give you a better texture later on when they’re done.
- Drain and rinse your pasta and put it aside, and grab a large mixing bowl. Whisk up your eggs thoroughly, adding in the milk and heavy cream until it’s all blended nicely.
- Put 1 cup of sharp cheddar off to the side, mix the remaining ingredients in with your pasta, and pour it all into your baking dish. Sprinkle the cheddar we put aside across the top and we’re ready to bake.
- Bake this uncovered in the center of your oven for approximately 40 minutes and then remove it from the heat. Let it set for 10 to 15 minutes to thicken up and then it’s ready to serve!
Parmesan Polenta
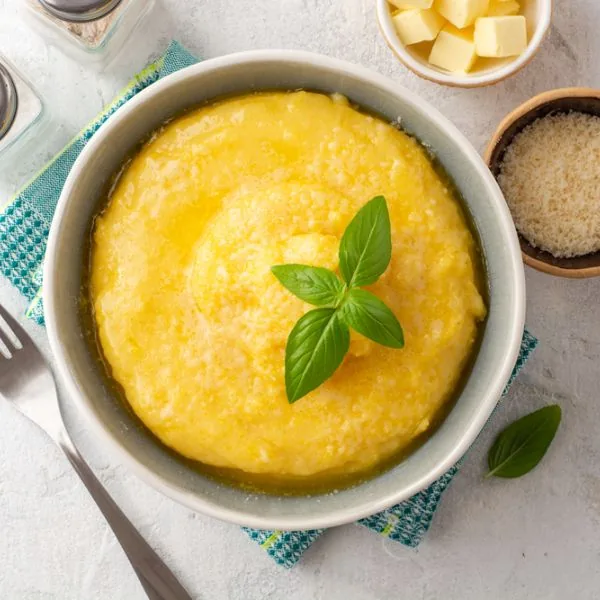
An Italian dish enjoyed around the world, polenta is a creamy dish made with cornmeal and butter that pairs perfectly with pork ribs on your plate. This particular recipe comes from Karen Tedesco at Family Style Food and if you’ve never had polenta before, this simple recipe will definitely get you hooked.
Try it with your pork and you’ll see for yourself – with only 5 minutes of actual preparation time, this is one family favorite you’ll find yourself coming back to again and again!
Ingredients for 6 servings:
- 4 cups water
- 1/2 cup grated Parmesan cheese(make a little extra for serving)
- 1 cup milk
- 1 and ½ tsp kosher salt
- 1 cup cornmeal (medium or coarse)
- 2 tsp chopped fresh parsley or rosemary
- 3 tbsp butter
Directions:
- In a heavy-duty saucepan, you’ll want to bring your milk and water to a nice boil, stirring in your salt as you do so.
- Start slowly sprinkling in your cornmeal, whisking as you go until it’s thoroughly blended, and then cover and simmer on low heat for 25 to 35 minutes. It should thicken up during this time and start pulling away from the side of the pan as it does so. During this time, frequent stirring will help to keep it from sticking to your pan, so keep an eye on it and stir as needed.
- Once it’s fluffy, then remove it from the heat and mix in your butter and cheese, and serve it up hot with a little extra cheese and rosemary on top. Congratulations – you’ve just created your first polenta – and once you taste it, this definitely won’t be your last!
Cast-Iron Skillet Creamed Corn Cornbread
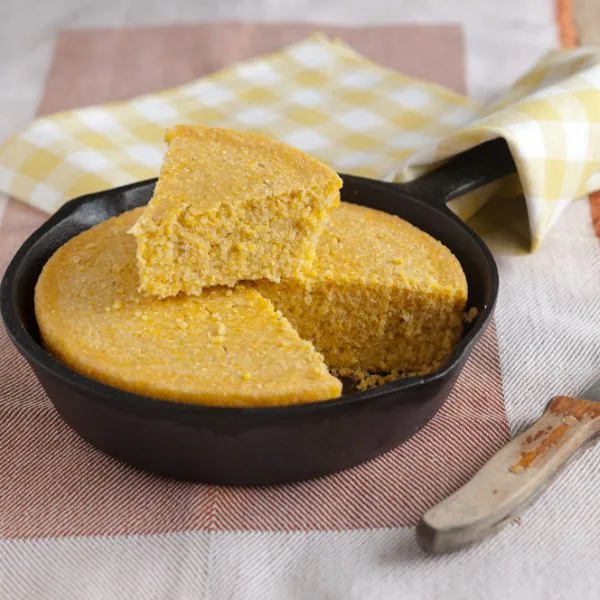
Cornbread and pork ribs get along like the best of friends – as long as you do it right! Cornbread needs to be soft, crispy at the edges, and since the kind that is baked in a cast-iron skillet is arguably the best, that’s what you’re getting today. This recipe from Nagi at Recipe Tin Eats is quick, delicious, and exactly what you need to make a proper pork rib dining experience, so let’s take a look at how it’s done!
Ingredients:
- 1/4 tsp salt
- 1/2 cup white sugar
- 1/2 cup melted unsalted butter
- 3/4 cup yellow cornmeal (medium grind)
- 3/4 cups milk
- 1 tbsp baking powder
- 1 – 2 tbsp melted butter (for baking phase)
- 1 cup canned creamed corn
- 1 1/2 cups flour (plain/all-purpose)
- 2 eggs, lightly whisked
Directions:
- Set a 10-inch cast iron skillet in the oven at 425 degrees so that it can preheat for the cornbread batter we’ll be mixing up next.
- Get 2 large mixing bowls – one for your creamed corn, melted butter, eggs, and milk, and another bowl for your cornmeal, flour, white sugar, baking powder, and salt. Mix the contents of each bowl thoroughly, and then pour your ‘wet’ ingredients into the dry and mix it all up again.
- Put on your oven mitts and take that skillet out, adding in a tablespoon of butter so that you can either brush the insides with it or simply swirl it around to give it a good, greasy coat.
- Pour your cornbread batter into the skillet as evenly as possible, so that you’ve got one flat surface ready to bake.
- Reduce the heat on your oven to 375, and bake your skillet cornbread for approximately 25 minutes. When it’s done, the top should be golden brown and if you stick a skewer or another sharp object into the cornbread, it should come out clean. If it’s gooey, then bake it just a little longer until it’s cooked throughout.
- Let it sit for about 15 minutes and you can either turn it out and serve it on a platter of your choice, or simply cut it into 10 pieces right in the skillet with a spatula nearby for a traditional Southern self-serve!
Classic Salad sides
Vinegar Coleslaw
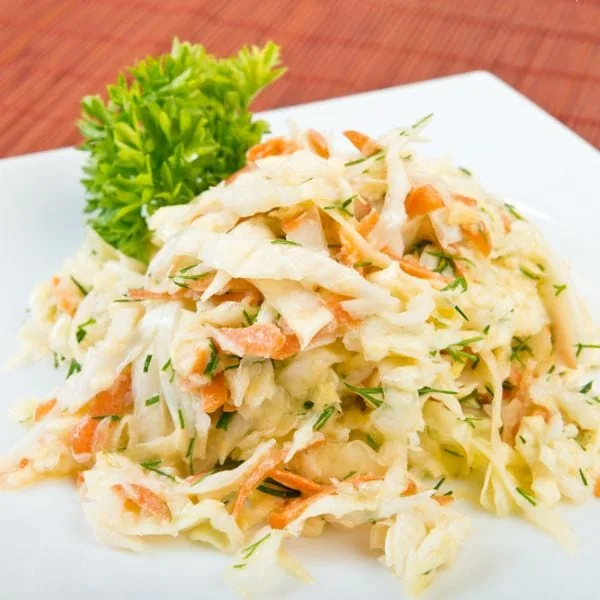
Cold, tangy, and crunchy… Coleslaw compliments pork ribs to the point that if you don’t make it, we can just about guarantee someone is going to ask where it went! Thankfully, it’s not complicated to make a flavorful Coleslaw and this recipe from Love and Lemons can help you make a GREAT one.
Let’s take a peek at what you’ll need to make this happen!
Ingredients for 4 to 6 servings:
- ½ batch of Apple Cider Vinegar Dressing (see below)
- ¼ tsp sea salt
- ¼ cup toasted sunflower seeds
- 1 tsp honey
- 1 tbsp chopped parsley
- 2 cups shredded red cabbage
- 2 medium carrots, sliced thin (peels)
- 2 scallions (chopped)
- 4 cups shredded green cabbage
Dressing:
- ¼ cup apple cider vinegar
- ¼ tsp Dijon mustard
- ¼ tsp sea salt
- ¼ cup extra-virgin olive oil
- 1 tsp maple syrup (or honey)
- 1 garlic clove (grated)
- Freshly ground black pepper (to taste)
Directions:
- In a small mixing bowl, combine your apple cider vinegar, garlic, maple syrup, mustard, salt, and pepper.
- With your olive oil handy, start whisking up your dressing, while slowly drizzling in the olive oil until your dressing starts to emulsify, and then put it aside.
- Prepare your veggies or if they are already prepared, then go ahead and put them in a mixing bowl and combine your veggies with half of the dressing that we’ve just made. Once it’s all mixed up nicely, simply put it in the refrigerator in a sealed container and let it chill for at least 20 minutes.
- Serve up with a little parsley and sunflower seeds and you can save the excess dressing for other snacks or even whipping up another quick batch of cole slaw – which might not be a bad idea, as you’ll see when you try it out!
German Tangy Mustard Grilled Potato Salad

Erin from Platings and Pairings shared a fine potato salad recipe that we think you’re going to love! With scallions, capers, red onions, dill, and Yukon gold ‘taters, it’s a little more flavorful than your average potato salad, and yet whipping it up is a piece of cake.
Serve warm or at room temperature – both are delicious – and with the steps below you can give it a test run to see if it’s a keeper in your book!
Ingredients to serve 8:
- ¼ cup chopped dill
- ½ bunch of scallions (chopped)
- ½ red onion (small, chopped)
- ½ cup chopped parsley
- 2 Tbsp olive oil
- 2 Tbsp drained capers
- 3 pounds baby Yukon gold potatoes
- Salt and pepper (to taste)
Dressing:
- ½ cup olive oil
- ¼ cup red wine vinegar
- 3 Tablespoons whole-grain mustard
Directions:
- Boil up some salted water in a large pot and preheat your grill to high, moving your pot there to finish cooking your potatoes for the remaining 8 minutes we’ll need to make them good and tender.
- Drain those spuds thoroughly and let them cool for a minute or two, before halving each of them. Make it a lengthwise cut for each and when they are sliced, add in 2 tablespoons of olive oil and put them back on the grill.
- Cook for 3 to 5 minutes, until we’ve got a nice, mild char to them, and while they are cooking you can combine your red wine vinegar, mustard, and ½ cup of your olive oil in a large-sized mixing bowl.
- When your potatoes have their slight char and your dressing is ready, remove the spuds from the heat and let them cool for just a few minutes before adding your dressing and the remainder of your ingredients. Mix it up with a little salt and pepper to taste and you’ve got one hearty potato salad that will keep them coming back for more!
Hawaiian Macaroni Salad
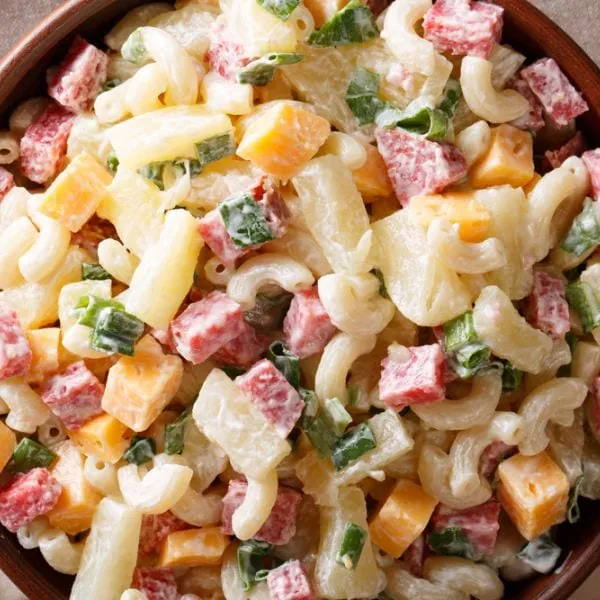
If you want a macaroni salad that’s got a bite to it, then this Hawaiian Macaroni salad from Erica Walker at Favorite Family Recipes might be just the thing to pair with your pork ribs. Just keep in mind this is one of those recipes that’s designed to be sinfully good, rather than good for you – but you can visit the original recipe if you want some healthier substitution options to tailor it a bit to your taste.
With that said, here’s how you make a Hawaiian Macaroni salad!
Ingredients for 10 servings:
- 1/4 cup milk
- 1/4 cup onion shredded (optional)
- 1 lb macaroni
- 2 tbsps apple cider vinegar
- 2 carrots shredded
- 2 tsp sugar
- 2 1/2 cups Hellman’s mayonnaise
- salt and pepper to taste
Directions:
- Go ahead and boil up your macaroni per the included instructions and once it’s nice and tender, drain it and move it into a large bowl.
- While that macaroni is still steaming, start sprinkling on your vinegar and then we can add the carrots and onions. Toss the salad thoroughly and then put it covered in the fridge for 15 to 20 minutes to cool down.
- Once your noodles have cooled down, you’ll want to whisk up your mayo, sugar, and milk in a separate, medium-sized mixing bowl, and then go ahead and start folding it into your macaroni to get the coverage as even as possible. You can add a little salt and pepper to taste but it’s not at its best yet. You’ll want to cover it and let it chill overnight or at the very least for 4 hours (and we really recommend overnight, it makes a difference!)
- Once you’ve let it sit and chill, your Hawaiian Macaroni salad is ready to serve. You can add up to 2 tablespoons of milk if you like but that’s up to you – it should be delicious and ready to eat as-is!
Mexican Corn Salad

Have you ever had ‘Mexican Street Corn’? If not, then you are in for a treat with this recipe from Gwynn at Swirls of Flavor.
With Mexican Street corn, corn on the cob is typically grilled, and then the kernels are stripped off, and mixed with lime juice, cheese, chili powder, and other special ingredients to give it an out-of-this-world ZINGER of a corn salad. While you COULD grill the corn first, this recipe will use smoked paprika to give it a little smoky flavor so that part is totally up to you – it’s going to be a hit as-is and you can make it in minutes!
Ingredients to serve 4:
- ¼ cup sliced scallions
- 1/3 cup mayonnaise
- 1 jalapeno, seeded and minced (roughly 2 tbsp)
- 1 cup crumbled cotija cheese
- 1 Tbsp lime juice
- 1 Tbsp lime zest
- 1 tsp smoked paprika
- 1 tsp chili powder
- 2 tbsp chopped cilantro
- 4 cups fresh corn kernels
Directions:
- We said it was easy and we weren’t kidding – mix all of your ingredients together in a bowl and it’s ready! You can chill it a little if you like (and it really brings out the lime even more) but that’s totally up to you.
- For extra flavor, you can serve it up with a little fresh cilantro or pop some spicy jalapeno slices on top and it’s just about as perfect as corn salad gets!
Mango Avocado Salad

Tired of the same old salads? If so, then this Mango Avocado salad is a delicious way to ensure that everyone is not only eating their fruits and veggies but that they’re happy to do so! This recipe comes courtesy of All Nutritious and it’s gluten-free, vegan-friendly, dairy-free, and delicious! Let’s take a gander at how it’s made and you can try it out for yourself.
Ingredients to serve 3:
- 1/2 red onion (chop fine)
- 1/2 English cucumber (peel & chop)
- 1 mango (peel and cube)
- 1 cup grapes, halved tomatoes
- 1 lemon
- 2 cloves minced garlic
- 2 avocados (peel and cube)
- 2 tbsp chopped, fresh parsley
Directions:
- Chop up your red onions first and add them into a large bowl, and next, you can skin your mangos and start cutting the fleshy bits as cubelike as you can.
- Slice open your avocados next and start cubing the flesh from these to add into your bowl and once that’s done, it’s time to peel your cucumbers.
- Once peeled, chop them up into thin slices and add them to your bowl, and then halve your grape tomatoes and toss those in as well.
- Squeeze in your lemon juice and then you’ll want to peel your garlic cloves so that you can use your garlic press to add the garlic into the bowl.
- Mix it all well and carefully and then you can add some chopped parsley on top as a garnish – your Mango Avocado salad is ready to eat!
Easy and Fresh Fruit Salad

Our final recipe is another must-have whenever you’re having a pork rib party – a fruit salad that people actually WANT to eat! While some people like to overcomplicate their fruit salads, this little gem from Michelle at The Gracious Wife keeps things simple and tasty with a mix of fresh blueberries, strawberries, grapes, and a little lemon and sugar for an exquisite ‘sweet-tart’ of a fruit salad.
Ingredients:
- 1/2 lemon
- 2 pounds strawberries (cut bite-sized)
- 2 pints blueberries
- 2 pounds seedless grapes (any kind, quartered)
- 2 tbsp sugar
Directions:
- Simply cut your strawberries into bite-sized pieces, quarter your grapes, and add your blueberries as-is into a large mixing bowl.
- Squeeze in the juice from half a lemon and add 2 tablespoons of sugar, mix it well, and cover your bowl to stick it in the fridge to chill until it’s perfect. You can chill it overnight but the sweet spot is usually 2 to 3 hours – lemon juice is acidic, after all – so keep that in mind when you’re making it and you’ll be good to go!
FAQs
It’s just about time for us to call it a day, but before we go we’ve got a few frequently asked questions about pork rib sides that you can use to your advantage.
We’ll keep them short and sweet and then we’ll go ahead and wrap things up. Let’s take a look!
What vegetables go well with pork ribs?
One of the easiest sides that always works with pork ribs is roasted vegetables. Broccoli, mushrooms, bell peppers, and squash are just a few examples that taste perfect with pork ribs and take very little time to make!
What is healthy to eat with ribs?
You can’t really have ribs without coleslaw, but any healthy salad option is not only recommended, but pretty-much tradition. You can go with things like sweet potato salads, classic iceberg-tomato-cucumber salads, even the classic ‘Jello fruit salad’ if it’s hard to get the kids (of all ages) to eat healthy fruits or veggies.
What are some other classic side dishes for pork ribs?
Squash or green bean casseroles are always welcome and go well with pork ribs, and other good sides include dirty rice, creamed corn, fried okra, and corn on the cob. It’s really hard to go wrong, so play with it a little and when you find favorites, then you’ve got a new flavor tradition that everyone will look forward to on the holidays and other get-togethers at home.
In Conclusion
Today we’ve talked about perfect pork rib sides for celebrating your summer and we hope that you’ve been well and thoroughly tempted along the way! Each of these dishes brings their own distinct flavor into the mix and they’re all guaranteed to compliment your pork ribs perfectly.
As they’re quick and easy to prepare, if any of these recipes are unfamiliar to you, then we highly recommend giving them a try to see what all the fuss is about. While we all tend to be picky about our favorites, you never know when a new recipe is really going to knock you off your feet and change your mind.
Thanks so much for reading and we hope to see you again soon!


David learned to cook at an early age after his mother told him that he couldn't live on pizza forever, Dave uses his modest kitchen skills to recreate sorely-missed recipes from home and to occasionally make new favorite ones from places he is visiting.