This guide complements any cupcake recipe by focusing on the best ways to fill cupcakes and we’ll explore different methods of filling cupcakes.
Cupcakes are a cultural phenomenon and a favorite around the world, with an estimated 770 million of them being consumed yearly in the United States alone!
While the right mix of dry ingredients is essential for the cupcake base, the filling is what makes them special.
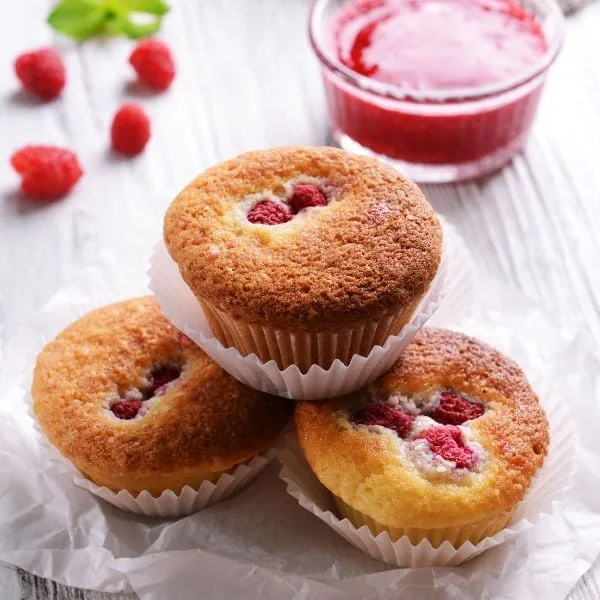
Some of the best kinds are filled cupcakes since you can put all kinds of delicious things inside – but what is the BEST way to fill cupcakes?
The most popular way to fill cupcakes depends on when you are filling them – pre-bake or post-bake. With pre-bake, you need a fairly robust filling like peanut butter, cookie dough, or chocolate chips, and you simply spoon in half the batter, add your filling, and top off the batter.
For post-bake, a piping(pastry) bag lets you inject your favorite fillings right inside the cake. You’ll just need to pop them open with a cupcake corer, cookie cutting, an ice cream scoop, or a paring knife, and then inject the filling and plug the top with the leftover cake. No muss, no fuss!
Making perfect cupcakes takes practice, but these palm-sized cakes are definitely worth the effort because filling cupcakes can transform them from ordinary to extraordinary. Each filled cupcake offers a delightful surprise with every bite.
These filling ideas are perfect not just for everyday treats but also for special occasions like a birthday party.
Today we’ll take a closer look at steps for pre and post-bake filling, types of fillings, and some DIY coring methods you can use to safely expose the cupcake center before filling it.
Let’s talk about the best ways to fill cupcakes and crafty backup plans that you can file away for cupcake emergencies!
Pre-bake or Post-bake – It all depends on the filling
The best method for filling your cupcake will depend largely on the type of filling. If you want to fill your cupcakes before you bake them, for instance, then you are going to need a robust filling that won’t react unpredictably in the oven or mix oddly with your cake batter.
That means using something a robust filling, with some examples of good pre-bake options including:
- Frozen chocolate chips
- Frozen blueberries
- Peanut butter
- Cookie dough
- Cream cheese
- Pie filling
These are just a few examples to give you a good idea of the texture and resiliency of the fillings that are suitable for pre-bake additions, but feel free to experiment – you never know when you’ll discover a real doozy of a pre-bake filling that you never thought would work!
1. Pre-Bake filling steps
When adding in a filling before baking, the steps are quite simple:
- Start by placing your cupcake liners in the muffin pan.
- Soon your cupcake batter carefully into your baking tray, so that only half of each cup is full.
- Next, spoon in a little bit of your layer of filling in the middle of the cupcake, but don’t overdo it – we still have to cover it up!
- After adding your filling, spoon more batter in on top but DO NOT fill the cup completely – your cupcakes are going to rise and expand quite a bit, and if you add too much batter you’ll be baking a flavorful mess!
- Bake as normal and if the filling is thick and robust, then you should have excellent results.
Ensure the filling is centered in each cupcake for even baking
Post-bake filling steps
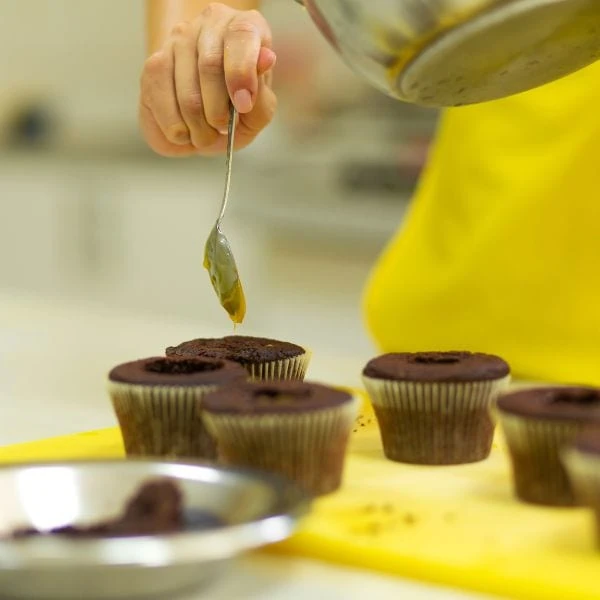
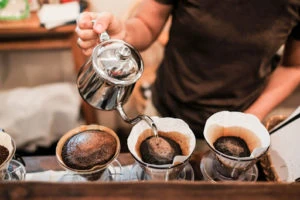
Filling your cupcakes post-bake is simply a matter of exposing the middle without destroying your cake and then filling it up with the delicious filling of your choice, using a bismark tip, via a piping bag (aka a pastry bag) or even a Ziploc bag you’ve filled and cut the corner on.
For those who prefer a more professional approach, using a large piping tip can greatly enhance your filling technique.
Whether you’re working with classic vanilla or rich chocolate cupcakes, the right filling can elevate your dessert.
You really have a virtually endless assortment of filling options, with these being a few of our own favorites:
- Fruit jelly or jam
- Honey
- Puddings or custards
- Frosting flavors that compliment the top-frosting
- Pie fillings (also good for pre-bake)
- Buttercream
- Sour cream
- Chocolate ganache
- Lemon curd
- Pie filling
- Dulce de leche
- Pastry cream
You get the idea! You can go wild with it, but first, we need to open up access to the cupcake center as easily as we can. You can use a wide variety of tools from around the kitchen to do this, and we’ll list them below and give you a quick run-down on how to use each:
- Cupcake corer
- Cookie cutter
- Paring knife
- Melon baller
- Spoon
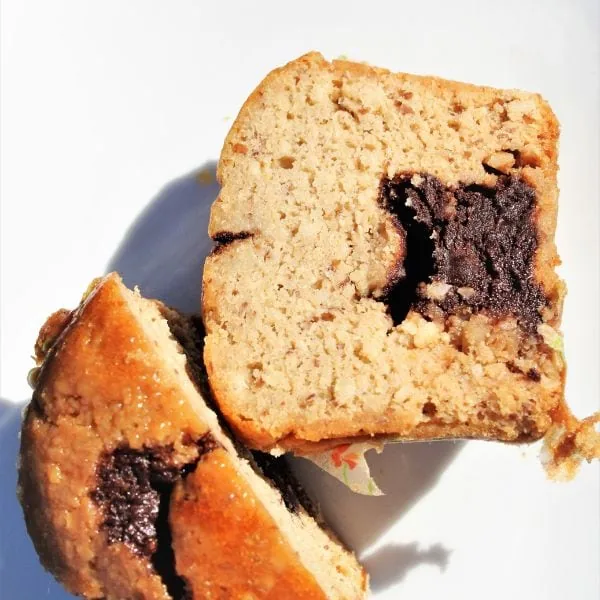
Once filled, carefully replace the cupcake top with a small piece of the removed cake. Then don’t forget to make the top of the cupcake look nicely finished with frosting or a dollop of your chosen filling.
2. Cupcake corer (Apple corer)

Cupcake corers are probably one of the BEST ways to precision-core a cupcake. To use a cupcake corer to do this, simply align it over the center and gently but firmly press it down into the cupcake, to a depth of ½ to ¾ of the height of the cake.
Be careful not to reach the bottom of the cupcake when coring to avoid leaks.
Lift the corer back out and you have a perfect little circle in the center of the cake that goes almost to the bottom so that you can pipe or otherwise fill the space, plug it, and frost your cupcake to perfection.
3. Cookie cutter
Cookie cutters are an easy way as well and work in a similar fashion as your cupcake corer. You’ll want to pick one that is about ¾ of an inch in size and to use it, simply press it into the center of the cupcake and give it a gentle twist as you raise it.
This should pull up a nice ‘cupcake plug’ and you can even scoop out a little more of the center with a teaspoon if you need to. Simply add in your filling at this point using one of the methods in the next section, and then plug the cake back up and hide your handiwork with some yummy frosting.
4. Paring knife

If you have deft hands, then a small paring knife is a fine option for quickly gaining access to the center of your cupcake to fill it. Simply angle the knife at 45 degrees and you want to cut in a circle so that the angle means you are cutting the shape of a cone.
Don’t cut it too deep – we only want to reach the center, not make a hole in the bottom! Once you’ve carefully cut your cone shape, you can carefully pull it out from the cake, add your filling, and then trim the cone a little before putting it back in, and then it’s ready to frost.
5. Melon baller

A melon baller is also a handy tool, especially for creating a neat, small hole in the cupcake.
6. Spoon
It’s not the most elegant solution, but if you absolutely HAVE to, you can use the edge of a teaspoon to trace a little circle where you want to cut and then push the spoon in at an angle to roughly approximate what you’d do with a paring knife.
Best post-bake filling methods for your cupcakes
Now that you’ve opened up your cupcake, it’s time to add in your fillings. The best way to do this is going to be with a piping bag (a pastry bag) and you can do it with or without a tip.
If you don’t have piping bags handy but would like a set, these Riccle Piping bags come with tips and they’re pretty fantastic – you’ll get 100 disposable piping bags, 1 silicone pastry bag, 16 stainless-steel frosting tips, 3 cake scrapers, 2 cake decorating ties for your bags, and 2 frosting couplers.
Now, if you DO already have piping bags handy, then for thick fillings you can simply cut the corner of a filled pastry bag and squeeze the filling right in. For thinner fillings, you’ll want to use a pastry bag with a tip, otherwise, things will get very messy!
Once you’ve squeezed in the filling, you can pop in your ‘cupcake plug’ and frost your cupcake so that it’s ready to eat.
If you don’t have a piping bag handy but you need to fill some cupcakes, then you’ve still got plenty of options hiding all over your kitchen. Some great filling options include:
- An ice cream scoop – An ice cream scoop is a great way to measure uniform amounts of filling and while you can use it to add actual ice cream to cupcakes if you like, it also works as a treat for cookie dough, peanut butter, and lots of other firm filling favorites.
- Measuring spoons – Measuring spoons are already designed for measuring ingredients, so if you want to use them to add a uniform amount of filling then it’s easy to do. Just scoop up your filling and carefully pour it in or nudge it with another measuring spoon to fill that center.
- Measuring cup – For fairly liquid fillings, a measuring cup really works as a treat. You can add your filling to the cup and simply use the spout to pour the filling right into the center of your cupcake. Easy-peasy!
- Teaspoon – You don’t need fancy measuring spoons to fill a cupcake – a teaspoon works just fine. Simply scoop up your filling, carefully position your spoon inside the hollow, and then pour or push those fillings inside.
Save the extra cake from your ‘cupcake plugs’
If you are adding a lot of filling, sometimes you’ll find yourself with extra cake bits, but don’t throw them away! Extra little bits of cake can be repurposed in lots of ways that you and your loved ones will surely enjoy. Here are a few examples of what to do with those extra bits and crumbs:
- Cake balls – Also called ‘cake pops’, a neat little way to save those cake crumbles is to bind them together with something yummy, such as cream cheese or buttercream, and then coat them up completely with melted chocolate or salted caramel. They’re delicious and you won’t be wasting any of your cake or cupcake crumbs anymore!
- Cake-crumb cookies – Caroline at ‘The Sweetest Hour’ has a great recipe for cake-crumb cookies that will give you a new recipe in your repertoire and a great repurposing option for your cake crumbs. You can find it here and give it a try!
- Tres-Leche – Tres Leches is a Latin dessert favorite that translates out to ‘3 milks’ as it basically amounts to cake soaked in condensed and evaporated milk, along with heavy whipping cream and YES, you can use your cake crumbles if you’ve got enough of them.
- Level-up your brownies – Try mixing some cake crumbles into your brownie batter and see what happens – the recipes can really be quite delicious!
- Deep-fried cake crumbles – If you’ve got some little cupcake chunks that you’d like to repurpose in a fun way, try battering them and frying them up. That way, you get the taste of the delicious cake centers, but with an out-of-this-world crunch that compliments them nicely.
- Use them for pie crusts – If you like to make cookie-crumble crusts from time to time, then try your next pie crust with cake crumbles, instead. You’ll be happy that you did!
- ‘Devil’s bread’ puddings – You can substitute cake bits for bread in your bread pudding recipes if you’ve got some good-sized cupcake plug leftovers that you need to work with. The results are pretty delicious and it’s a fun way to ‘shake things up’ with the occasional bread pudding to keep this dessert staple interesting.
- Ice-cream cake shakes – 2 scoops of ice cream, cake crumbles, nuts, and whatever else you feel like adding can make some excellent shakes that will keep folks coming back for more!
These are just a few examples but we think that we’ve driven the point home – Don’t throw away your delicious cake bits when you are making cupcakes or in those bad-luck instances where your cake comes out crumbly.
There is ALWAYS something cool that you can do and who knows? You might just like what you make with the crumbs even better than the cupcakes or cake you wanted to make in the first place!
FAQs
It’s almost time to end our cupcake-filling odyssey, but before we close things down, we thought we’d answer a few frequently asked questions on the subject to be just a little more useful before we go.
Let’s take a look and then we’ll get to formally wrapping things up!
Do you fill cupcakes warm or cool?
It’s best to let your cupcakes cook before filling them so that they are nice and dense. This not only makes them easier to work with, but it helps to keep filling and cake fairly independent of each other.
When a cupcake is still warm, sometimes it’s still a little mushy inside, and won’t mix as well – so wait a bit and let them cool before you introduce your fillings and your cupcakes will be all the better for it!
One last thing is that you should make sure your fillings, especially buttercream frosting and chocolate ganache, are at room temperature for easier handling.
For fillings that require cooking, such as chocolate ganache, you can use a small saucepan to melt and mix your ingredients before cooling them to room temperature.”
Will filled cupcakes get soggy?
Yes, depending on the filling, you can be inviting a bit of sogginess over time, which is why it’s a great idea to keep your filling in the fridge or stored in an airtight container and simply to fill the cakes before your guests arrive or before you need to deliver them.
That way, they’ll have less time to get soggy from the fillings and they’ll taste much better.
How long do filled cupcakes last?
While a cupcake without filling and which is unfrosted might last for up to 2 weeks in an airtight plastic container in your fridge, frosted or filled cupcakes are usually only good for 3 – 4 days. On the bright side, they do freeze well – for up to 6 months, if you can wait that long.
So, if you have extra cupcakes you can always wrap them in plastic to prevent freezer burn and put them in a plastic container for extra protection, and then just take them out to defrost in the future when you’re having a bad day and could really use a yummy cupcake or simply feel like it’s ‘cupcake time!’.
In Conclusion
Today we’ve talked about the best ways to fill cupcakes to take your cupcakes to the next level.
If you are filling them before baking, then you can simply spoon in half of the cupcake mix, add your filling, and then top it off (leaving room for it to expand).
For post-bake cupcakes, you can hollow them out with a cupcake corer, a cookie cutter, a paring knife, or even make do with a spoon in a pinch.
Once you’ve done that, simply add the filling with a piping (pastry) bag or use an ice cream scoop, measuring spoon, teaspoon, or measuring cup, and seal the top, and frost it. For best results, you should also wait to add those fillings until just before you want to serve the cupcakes.
That way, your cakes will be firm, filled, and perfect, but never SOA – soggy on arrival!
Out of all these methods, what’s your favorite way to fill cupcakes? Do you have another way to do it? Let us know down below in the comments.
More baking guides

David learned to cook at an early age after his mother told him that he couldn't live on pizza forever, Dave uses his modest kitchen skills to recreate sorely-missed recipes from home and to occasionally make new favorite ones from places he is visiting.