Nothing will damage your ‘cooking cred’ quite like burning rice. It doesn’t matter if you can whip up a flawless Béarnaise or conjure up a Baked Alaska without making a melty mess, if you accidentally burn rice in front of a friend then you might never hear the end of it.
Thankfully, it’s all about knowing the variables, so today I’m going to take a moment to quantify the most common rice-burning factors, both in a standard boiling pot and a rice cooker, and we’ll even discuss the middle ground for those that want a delicious brown – but not burned – crust.
Let’s explore how to cook rice without burning the bottom by means of science and clever kitchen craft.
Bottom Line Up Front
I used to go with strict measurements, but these days I use the ‘Finger Trick’ to get the perfect water amount and if I’m not using a stovetop or a rice cooker that I already know like the back of my hand, then extra stirring usually makes for perfect rice
Unless you want the best of both worlds with a perfect brown crust as you get with Gouba or Tahdig, which I’ll talk about more in this article towards the end.
Cooking rice in a boiling pot
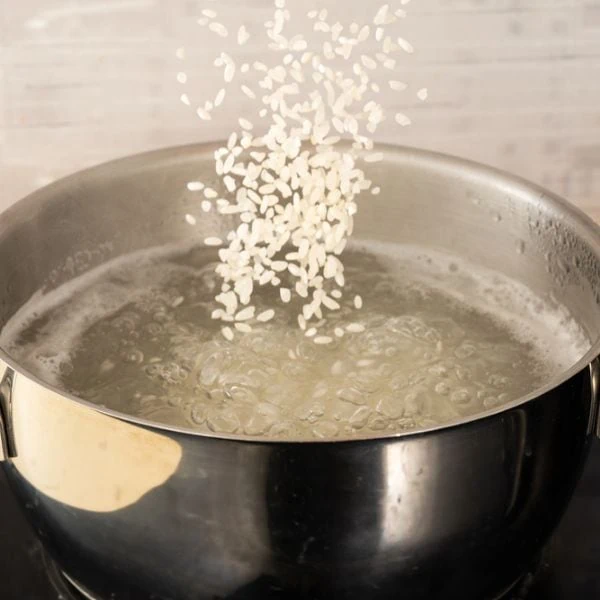
While rice cookers are nice, a lot of traditionalists out there prefer cooking their rice in a boiling pot. It DOES give you more control, although rice cooker technology can do some neat tricks these days (and I’ll touch on that more in the rice cooker section).
I tend to use a pot more because traveling is another passion of mine, so I’ll give you the benefit of my personal experience in this regard. We’ll start with the most common mistakes and then I’ll give you a step-by-step so that you’ll have a more complete picture of exactly what to do and what NOT to do.
The 4 Most common reasons rice burns in a boiling pot
While a lot of this is common sense, we’re painting a picture here so let’s look at the basics. Here are the most common reasons that a deceptively simple task such as cooking up rice can take a trip to Burnsville.
1. Not enough water
The water question gets a lot of debate, although the biggest reasons for the confusion are the stove variables or simply folks using the same amount of water for all types of rice. As a result, you get people telling you to use 2 cups of water for 1 cup of rice, and others swearing it should be 1 ¼ cup of water to 1 cup of rice.
In a way, both can potentially be correct with the right factors. 2-to-1 is the safest, but it’s more of a safety measure against overly hot stoves than anything unless you are cooking brown rice. Even then, it’s just CLOSE. With the 1 ¼, it’s just about perfect, but only if you are cooking short-grained white rice, but that measurement will do evil things to brown, red, or long-grain white.
You can cut the Gordian knot one of two ways – the scientific approach or the ‘finger method’, so let’s start with the kitchen science first via a baseline for water that factors in the rice type. It’s good data that matches my own personal experience that was compiled courtesy of JoAnna Minecci at wikiHow.
I’ve put it in a basic chart for at-a-glance convenience:
| Rice Cookin’ Cheat-Sheet — Measurements per EACH full cup of rice | |
| White rice – Short Grain | 1 ¼ cups of water |
| White Rice – Medium Grain | 1 ½ cups of water |
| White Rice -Long Grain | 1 ¾ cups of water |
| Basmati or Jasmine Rice | 1 ½ cup (if unwashed), otherwise 1 to 1 |
| Brown Rice | 2 ¼ cups |
| Rice sold as ‘parboiled’ | 2 cups |
Okay, now that the kitchen science method has been covered, we’re going to address the ‘Finger trick’. Some of you out there know this. I didn’t learn it until my travels took me to the Philippines, where it’s basically gospel for cooking with a rice cooker or a boiling pot (unless you’re deep in a province or camping and using a boiling pot and a campfire, in which case go with 2 to 1, stir a lot, and pray).
The Finger trick is not just limited to the Philippines, but actually used throughout most of Asia – India, China, Philippines… just about everywhere – and with that said, here’s how to do it.
- Clean your rice directly in the pot or strain it and deposit it there.
- Clean your hands (with lots of rinsing to remove any soap) and poke a hole in the center of your rice.
- Pour water in up to your phalanx/just under the first knuckle for a firm, drier rice, or right up to your first knuckle for softer.
You can see a video of this brought to you by Nigel Ng Kin-Ju, a UK-Based comic and cooking aficionado who was born in Malaysia and better known under the name ‘Uncle Roger’. Here’s the video:
While it doesn’t have the clinical appeal of the chart, it works and the type of rice doesn’t seem to matter. I’ve done this with white rice or various lengths, basmati, and jasmine and the only times it has burned have been when I was focused on writing something that needed all of my attention or Netflix was involved.
As they say, sometimes when a plane crashes, it’s simply the pilot’s fault. Try the finger trick and you can see for yourself why it’s an Asian tradition. It works, plain and simple.
2. Stove variant
You aren’t always cooking at home. You might be at a friend’s house or visiting family.
Maybe someone special took you out camping and you’re hoping to spice things up with a ‘campfire difficulty level’ fancy meal. If you don’t know the stove and it seems hotter than your model at home, an extra ¼ cup of water and more stirring can save your rice without making it overly soggy.
If you happen to be camping, here’s a little protip. Watch how long you take the cover off when you are stirring your rice – every 5 minutes that boiling water is uncovered, about ¼ of a cup, will evaporate.
So cover it up again immediately after stirring so it won’t end up dry or accidentally scorched.
3. The thinness of the metal
If the bottom of the pot that you are using is too thin, then the rice on the bottom is more likely to scorch. It’s too close to the heat. You can compensate by stirring and pushing your spoon along the bottom, but make sure you don’t use a metal spoon if the pot has a non-stick coating.
Check all the available pots first and go with the thickest bottom for the best results. If you don’t have a pot, check our guide to the best pots to boil rice with.
4. Not enough stirring in the beginning
You should start out with higher heat and once it’s boiling, move it to a simmer. If you don’t stir it enough during this process then some rice can stick to the bottom and if it isn’t dealt with, then it might burn.
This is especially common with rice in the United States, which has added nutrients and also starch that is put in during the refining process. Just stir it extra in the beginning as you would with the thin-bottom scenario to loosen up the bottom grains so that they won’t stick.
How to cook rice in a standard boiling pot – Step by Step
Okay, bringing together the factors we’ve just discussed, your cooking steps will look like this:
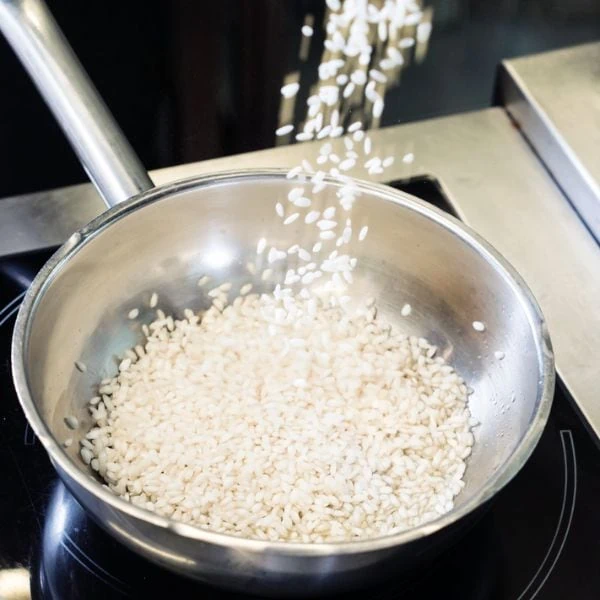
1. Clean your rice in a pot or use the sieve method, then deposit the wet rice back in the pot.
2. Make a hole in the center with your index finger and add water up to your phalanx for drier, firm rice, or up to your first knuckle if you like the rice to be a little softer.
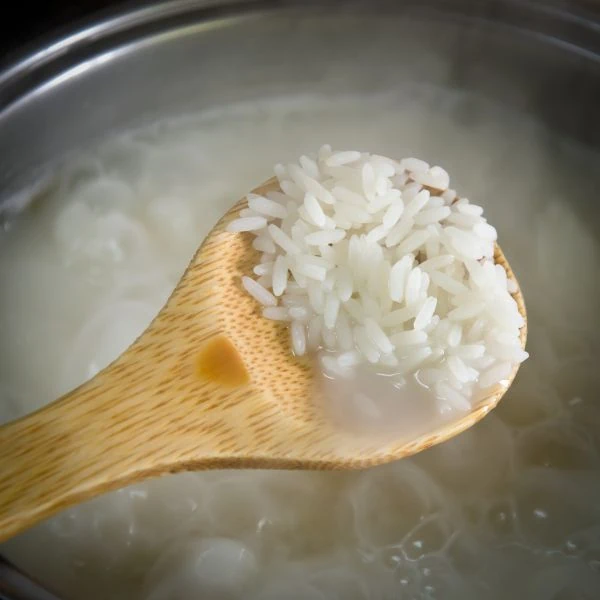
3. Bring your water to a boil, stirring occasionally to prevent any rice from sticking to the bottom, and then reduce it to low heat for simmering.
4. Cover your rice and let it simmer for a length of time, based on the type of rice. 30 minutes for brown rice, 20 minutes for short-grained varieties, and 15 minutes for long and medium-grain rice.
5. Remove from heat and let your rice sit for 10 minutes, still covered, so that the remaining water can soak into the rice. Voila! Your perfect rice is ready!
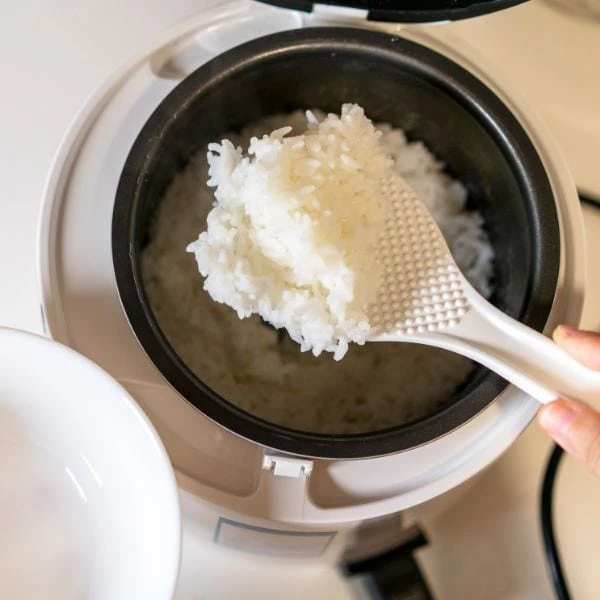
Cooking rice in a rice cooker
I like rice, but for myself and many other Americans (and also Europeans) bread usually does the job of making a meal more filling and rice takes second place as an ‘occasional’ thing. So, for me at least, getting a rice cooker was something I never considered until my travels took me to Asia.
Here, it’s the other way around – bread is more of a treat or only occasionally served with meals, and rice is the staple. As it turns out, having a rice cooker is an awesome thing.
If you are looking for a rice cooker, check out our buying guide on the best Japanese rice cookers.
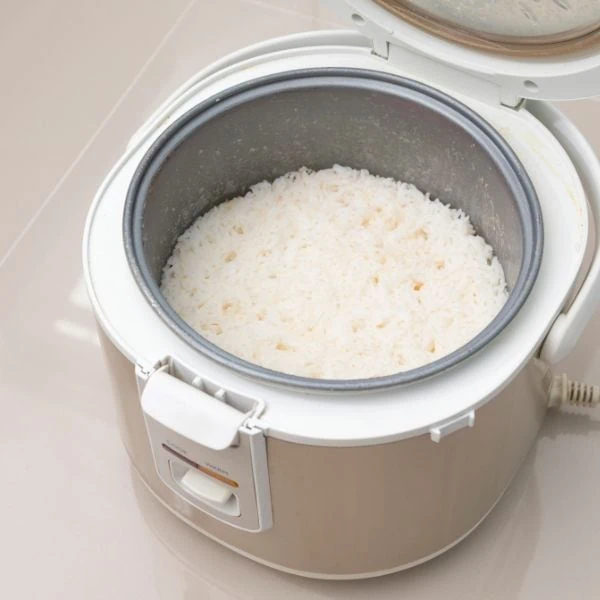
You can make rice with almost no effort at all and even better, with the ‘warm’ setting you can keep it hot and available for 10 to 12 hours. Just about everyone has a rice cooker here and I get it now – having easy, on-demand access to yummy rice all the time is a truly sweet deal.
Those of you who already have a rice cooker probably just said ‘uhh huh’ and nodded knowingly, but for those of you out there who learned about them later in life like me, I’d have to say that they are definitely worth owning.
Your chances of burning the rice with a rice cooker are almost nil and while it CAN still happen, it’s going to be much less likely if you know how the cooker works and the most common reasons why a cooking session might go south.
Understanding how your rice cooker works
The most basic rice cookers out there have two settings by default – heat and warm. By means of an internal thermometer and a heating element, they are able to get the water to boiling and then reduce it to simmer automatically.
By means of an inner pot, the rice is housed to cook and it’s technically separate from the main unit a non-stick coat (in most models) on the inside means that you won’t hate your rice cooker when it’s cleanup time.
Some of the pricier models even give you cool extras, like a steaming tray, or with Persian-style models, the option to automatically cook your rice with a deliberate brown, delicious crust at the bottom. This is good for fancier dishes like Chinese Guoba (lightly scorched rice for a little crunch) or Persian Tahdig (brown crust rice, often mixed with yogurt for added flavor).
5 Reasons why a rice cooker might burn your rice

While these are fine machines, you can still end up with burned rice if you don’t know the potential pitfalls. Let’s take a look at them so that they will not sneak up on you and burn a crucial part of your meal.
1. Water again — but for a different reason
Your rice cooker will have marks on the inside to guide you with the amount of water that you should use. Until you have played with the cooker enough to know it well, use those lines religiously.
Check your manual, too, just in case they have different recommended amounts than what you would normally use. With so many models out there, it’s best to check and err on the safe side.
2. Check the non-stick coating on the bottom
If your rice cooker has a non-stick coat at the bottom, it’s imperative that you only do your stirring with a wooden or heat-resistant plastic spoon. Using metal can damage the non-stick coating and when that happens, rice will stick in some areas and burn.
3. Are you cooking less than the minimum amount of rice supported?
Sometimes burning occurs when you are making a small, midnight snack, and when this happens it’s usually because you’ve put less than the minimum supported amount inside. With the exception of some small personal cookers that are designed for cooking 1 cup of rice, the smallest amount you should usually use is 2 cups of rice.
Check your manual to be sure, of course, but this is the most common minimum.
4. Might be your cooker
If you got a suspiciously good price on your rice cooker, then it might be time to upgrade. While it’s uncommon, discount models can wear out more quickly or they simply do not measure and distribute the heat as efficiently as some of the better models on the market. Thankfully, Amazon and other product reviews are your friends.
You don’t have to get the most expensive model, but if you see one on sale just be sure to read up on it first – it’s worth the extra few minutes to pull up some reviews. Finally, if you consistently get a brown crust at the bottom, then check your model to see if it’s for making Persian rice dishes.
Persian rice cookers do this on purpose, as the crust is considered delicious in many cultures, especially in Iran and China!
5. It was on warm for too long
Despite what the internet will tell you, this really does not happen very often. Your warm setting should be good for 10 to 12 hours and to be honest, many folks use it for 16 – 18 hours at a time with no ill effects.
It’s designed to keep the rice warm so that it doesn’t go bad and the average temperature of the ‘keep warm’ setting is 150 degrees Fahrenheit/65.5 degrees Celsius. It’s highly unlikely to burn your rice unless something is wrong with that setting on your cooker.
Some models even have an ‘Extended keep warm’ setting that’s at a lower temperature, so if you think it’s the ‘warm’ setting and you have this option, then try the ‘extended’ setting to see if this fixes the issue.
If it doesn’t, the internal thermometer may be out of whack and it might be time for a new rice cooker.
Cooking rice in a rice cooker – Step by Step
Okay, now that you’ve got a foundation on how it works and what to avoid, here’s how you cook rice in a rice cooker:
After cleaning your rice, dump it into your rice cooker, employing the ‘Finger trick’ to add the perfect amount of water, or simply use the markings on your cooker to determine the right amount.
As models vary, the most common next step is simply to turn it on and let it do the rest. Check your instructions, especially if you have a higher-end model that comes with extra instructions.
What if I am making a Persian Tahdig or Chinese Guoba?
For some delicacies, a little ‘burn on the bottom’ is actually intended, so I’d be amiss if I didn’t touch on this.
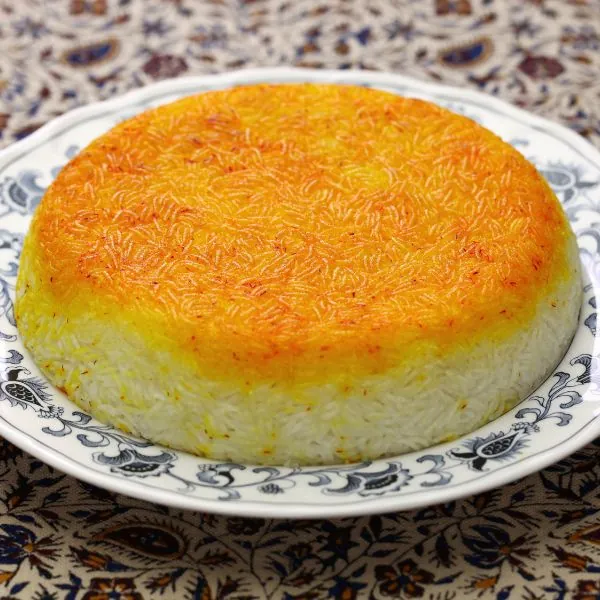
Two examples where this is the case are Tahdig, a saffron-infused rice, often with yogurt added, that is baked a nice brown on the bottom so that it packs a flavorful crunch. The name is Persian and translates simply to ‘Bottom of the pot’.
Chinese Guoba is similar, though without the yogurt – the name just means ‘scorched rice’ and that’s what it is. It’s not scorched enough to taste ashy, but just enough to give it a crunch and a slightly nutty flavor.
Making Tahdig with a standard boiling pot

Sometimes ‘burnt is better’, and to prove it I’m including a recipe for Persian Tahdig that you can try at home. This comes from Suzy Karadsheh at The Mediterranean dish and it’s her adaption from a book by Eden Grinspahn called ‘Eating Out Loud’.
Ingredients
- ½ tsp ground cinnamon
- 1 cup dried cherries (chopped fine)
- 1 to 2 tbsp Kosher salt
- 1 tsp saffron (threads)
- 2 cups basmati rice
- 2 tbsp grape seed oil (or a favorite oil of your choice)
- 2 tbsp whole milk yogurt (I like Greek, but pick your favorite)
- 3 tbsp pistachios (roughly chopped)
- 8 tbsp unsalted butter (cut into cubes)
- Grated zest from 1 orange
Instructions
1. Activate your saffron by placing it in 1 cup of WARM (not hot) water. Let it sit for at least 10 minutes to make sure that get the most flavor from it.
2. Get a large pot and add 8 cups of water, along with your salt, and bring this to a boil over medium-high heat. While that’s heating up, put your basmati rice in a sieve and run water through it until it comes out clean and clear. Add your rice to the pot and boil it for 5 to 6 minutes before draining the rice.
3. In a medium-sized mixing bowl, add 1 cup of your rice, along with 2 tablespoons of saffron water, the yogurt, and your grapeseed oil. Mix it up well.
4. Spread this mixture at the bottom of a 10-inch non-stick, lidded pot, and now we’re going to do some layering with the remaining rice. To do this, sprinkle your rice to make a small layer, adding 2 tablespoons of cherries, along with just a pinch of cinnamon and orange zest. Repeat this until you run out of rice.
5. Add your butter on top as evenly as possible and then add the rest of your saffron water and we’re ready to cook it. Suzy recommends that you wrap a clean towel on top of the lid, securing it around the pot with a rubber band. This will help to make sure that you keep most of the steam for cooking.
6. Cook it on low heat for 25 to 30 minutes, peeking occasionally. You want the edges to turn a golden brown and for the first time making this, that should be okay – later, you can leave it in a little longer to get a darker crust on your Tahdig without overdoing it. For now, this should help you to learn how fast it will cook so that you can accurately gauge for next time.
7. Once it’s browned, put on some gloves, and it’s time to carefully transfer your Tahdig. You’ll do this by putting a platter-type plate serving-side down on top of the pot and carefully turning it over. Have a wooden or heat-resistant plastic spoon handy in case it sticks a little. A little poking should loosen it up if that happens and help you get it transferred to the plate.
8. Sprinkle the remaining cherries and your pistachios on top and your Tahdig is ready to serve!
Making Tahdig with a rice cooker
Suzy’s recipe SHOULD work with a Persian rice cooker, but as I have not tested that out I can share an alternative that will work from Overhug. Let’s look at those steps:
Basically, without a Persian rice cooker, the closest you can get with an Asian-style model is cooking your basmati rice with saffron water (as from Suzy’s recipe) until it’s done, but not yet browned.
1. So, your first step is to simply cook your rice with saffron water as you would normally. The only exception is that you should wrap the lid with a towel, as in the previous recipe.
2. Take your rice out of the cooker and give it a brief rinse with water in your sieve. Add a little cooking oil to the bottom of your cooker or spray a little no-stick cooking spray, and then add a small amount of rice to make a bottom layer. Mix a tablespoon or two of yogurt into this and then add the rest of your rice on top.
3. Here’s where it gets tricky – to ‘hack’ your way to a Tahdig, you need to turn on the high cook setting and keep an eye on your rice. The oil will help to keep it front burning, but with so many models out there, you’re going to need to experiment to find the perfect time.
By gently probing at the side you should be able to see signs of browning and when you do, then you can flip the Tahdig onto a platter, but take note of how long you cooked it. That way, if you want it a little browner, you’ll have a good approximation of the exact time needed with your cooker.
4. Alternately, consider adding a Persian rice cooker to your kitchen arsenal, with Pars or Zojirushi being two excellent examples.
Aside from Tahdig, you can really have a lot of fun making a crunchy, browned layer based on your own experience and experimentation. Maybe you’ll add a little ground beef and some veggies, maybe a little yogurt, garlic, and butter… go all ‘Mad Scientist’ on it!
Experimenting is the fun part and even if 4 out of 5 of them come out ‘so-so’, it’s that interesting and delicious ‘1’ that comes out AMAZING that makes it well worth your while!
For more ideas for what you can use a rice cooker with, see our list of the best rice cooker recipes.
Some closing words before a quick FAQ
Today we’ve gone over the basics of how to cook rice without burning the bottom and it really boils down to knowing the pitfalls and knowing your equipment. When in doubt, just remember that a little extra water is easier to work around than burnt rice and a little extra stirring won’t hurt – or just use the Finger trick. There’s a reason that this is a tradition in so many Asian countries – it works.
Also, don’t forget to keep a close eye on non-stick linings – once they become compromised, they’ll eventually stab you in the back if you’re not careful. Finally, burnt isn’t always bad, so don’t be afraid to experiment with browning a little. It’s fun, tasty, and can be a new trick to impress your friends or spoil that special someone with!
FAQ
Before I go, here are a few quick common questions and their answers in case I missed some things along the way.
Are there any other exceptions to the 1 to 1 rule?
Hiroko Shimbo from Hiroko’s Kitchen has shared a neat little piece of advice on this. For long-grain rice, take 1 cup of rice, minus 2 tablespoons, and cook it with 1 cup of water. Hiroko says that this will give your rice the same fluffiness that you get from your local Indian take-out restaurants.
Should I always wash the rice first?
Yes, typically, although with United States rice it’s really going to be up to you. U.S. rice has added starch and nutrients, so washing it out will reduce its overall nutritional value. That said if you rinse and dry rice in advance, the reduction of the starch will help to ensure that your rice doesn’t come out so sticky.
Without washing, the starch in the rice gets gelatinized, and that’s why you get clumpy rice. With arborio and glutinous rice varieties, it can be even more problematic.
You’ll get a weird texture that’s kinda like chewing on bland gummy bears, although that’s not a bad thing if you are cooking something like Japanese sweet rice for a traditional dessert recipe or making Filipino Suman (sweet glutinous rice that’s steamed in banana leaves and tastes AMAZING).
Does salt also stop the rice from sticking?
Yes, it actually does! Adding salt not only imparts flavor, but it helps to reduce the chances of your rice clumping together and sticking to everything. You can even have fun with it by trying flavored salts, such as Smoky sea salt!


David learned to cook at an early age after his mother told him that he couldn't live on pizza forever, Dave uses his modest kitchen skills to recreate sorely-missed recipes from home and to occasionally make new favorite ones from places he is visiting.