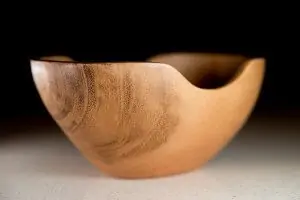
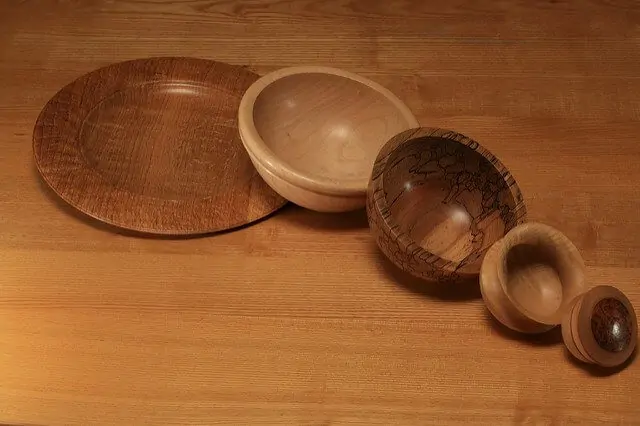
Wooden bowls make a great rustic addition to your kitchen decor. They’re perfect for serving all kinds of dishes, from salads to fruits and more.
But if you use these wooden serving bowls often, you might notice that they start to lack some of their luster over time. This can be due to over-washing, an accidental run through the dishwasher, or a lack of proper preservation of the wood material.
However, cleaning and caring for these products isn’t as complicated as you may think. Natural cleaning solutions and preservation methods are simple and readily available. To keep your wooden bowls looking shiny and new, make sure you’re cleaning them correctly with the tips below.
Everyday Care
If you’ve just finished serving your meal and you’re wondering whether or not to throw the wooden bowl in the dishwasher with everything else, give that a second thought. The harsh washing cycle and chemically-infused soap pods will do major damage to the bowl’s finish.
For everyday care of your wooden bowls, just rinse with warm water and wash gently with a soft sponge and mild soap.
Avoid submerging the bowl in water, since this will cause the wood to swell and possibly crack. Dry the dish with a soft towel and be sure to let it sit out overnight to air dry. Storing the bowl in a cabinet without letting it fully dry can also cause swelling and cracking.
Conditioning is Key
Every month or so, no matter how much you use it, your bowl will need some upkeep in order to maintain the color and shine of the wood. To do this, all you’ll need a soft cloth and a conditioning oil.
After gently washing the bowl as described above, rub a liberal amount of conditioning oil onto all sides of the bowl. Make sure to get the sides and bottom of the bowl as well. Set the bowl on a towel to let the oil sink in for a few hours, then apply a second coat.
Repeat this until the bowl doesn’t seem to absorb any more oil. With a clean, gentle cloth, rub off any oily residue left over. You’ll see your bowl’s color instantly go back to its original vibrancy.
Oil Choice
There are all kinds of conditioning oils to choose from, but it seems like mineral oil is the most popular option. You can find mineral oil in your local grocery or drugstore (it has medical uses as well!) or at Amazon for a reasonable price.
Mineral oil is a great choice for cleaning cooking materials because it is food safe, won’t harden on the surface of your bowls, and it also won’t harbor any kind of bacteria like other oils might. Walnut oil is another option, since it’s food-based and safe for cooking surfaces. It’s also reasonably priced.
Here’s a spray walnut oil at Amazon.
Full Restoration
If your wooden bowl is straight out of the antique shop, you may need to give it some serious elbow grease. These older bowls tend to lose their original finish and have years of stains and scratches. Luckily, the restoration process is still fairly simple:
Disinfect
You’ll want to completely disinfect the surface of your new or vintage bowl before using it for your own cooking purposes. Use a clean cloth to wipe down the entire bowl with a disinfectant like hydrogen peroxide or vinegar. Let this sit for a few minutes before rinsing with warm water.
Deep Clean
After letting the bowl dry from the disinfectant, give it an all-natural deep clean with a mixture of coarse sea salt and lemon juice. Sprinkle a generous amount of the salt into the bottom of the bowl, drizzle lemon juice over the salt, and scrub this solution into the bowl to even out the surface and give the bowl a deep clean.
Restore the Finish
After thoroughly cleansing, it’s time to remove the old, tattered finish of the bowl with either steel wool or sandpaper. Start with the coarsest material to remove most of the finish, then move to the medium material to smooth out the uneven areas and remove the rest of the finish. You’ll know you’re done when the dish feels smooth to the touch and the color is different.
Make sure to use a clean, slightly damp cloth to remove any leftover dust and residue before moving on to conditioning.
Condition
Repeat the conditioning process as described above (rub a generous amount of oil into the wood with a clean cloth, set to dry, and repeat until the wood doesn’t absorb any more oil).
This process will restore the bowl to it’s beautiful, original color and shine while giving new life to your wooden bowl.
Here are some cool bamboo tongs from Amazon to go with your
newly restored bowls. I like these salad hands too (Amazon).
Conclusion
Whether you’ve owned your wooden dish for years or just bought a brand new one, these tips are useful for anyone who wants to maintain the crisp, rustic beauty of their wooden bowl. Impress your dinner guests with a vibrant, sparkly clean serving bowl every time with the tips above.


Alexis DeAnda is a food fanatic, library card user, and cast iron hunter, in that order. She has been cooking for anyone that will taste it ever since her mom let her make doughnuts on Saturday mornings at the age of 7.