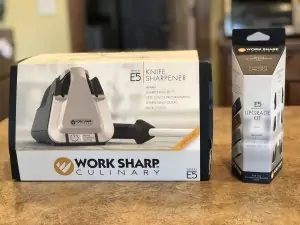
Here is the sharpener I own and actually use. Work Sharp sent me a model to test at no charge to me, and all opinions are my own. See the Work Sharp E5 at Amazon. They are based out of Oregon — a 4th generation family owned company. They have a focus on the outdoors, however, this Culinary model is made for the kitchen.
Are you looking for the best electric sharpener on the market? Then you are in the right place! If you are in a hurry, then check out this sharpener at Amazon – Work Sharp Culinary E5, my personal favorite.
How do you find the best knife sharpener for you?
This guide provides the info you need to make an educated decision about the best knife sharpener for you. There are tons of features, specs, and jargon that you may not be aware of.
When I got my first whetstone as a young kid to sharpen my Cub Scout pocket knife, I had no idea how to use it or that there were a plethora of choices for making blades sharp.
I am pretty sure that I didn’t make the blade sharper but I think I felt good about the process.
Electric knife sharpeners have the advantage of speed due to the automation of the grinding, usually 1 to 2 minutes from start to finish. If the blade just needs a touch-up, then the process may only take under 30 seconds!
Scroll down to see the electric sharpener ratings as judged by real users and subjective input that considers pricing, value, and durability under real usage.
Electric sharpeners are fast. Period.
FACT: All blades will dull over time.
This is one of the reasons that electric models are ideal for kitchen cutlery applications, even gourmet cutlery made with very high-quality metal.
They are very simple to use once you get down the basics, and understand your particular model. Let’s get one thing straight – if you’re on the fence about whether or not you need a sharpener, then here is a fact you may need to consider.
")
This is the 2-Stage Wusthof.
All knives, even blades of the finest steel, will dull over time. Better steel will stay sharp longer but it will still dull over time with dishwashers and without.
In fact, the factory sharpness will be gone within several days or a couple of weeks of regular use. Not to worry though – nearly all sharpeners can get your blades better than the factory edge.
Yep, sharper.
Let’s get into the details with a quick reference table… This table contains a list of the top 5 best electric knife sharpeners as reviewed by actual users, with consideration of the features, durability, cost, and reviews by real users.
Why do you need a knife sharpener?
A sharp blade is critical for the performance of your knife and your safety. This applies to any type of knife – chef’s, paring, pocket, survival, switchblade, or even a machete.
A sharp knife is important for safety since a dull blade requires more force to do the job than a sharp blade.
The bottom line is that if you have a knife or knives, then you absolutely need a sharpener to keep your blades in top form.
Some companies do offer the service of sharpening their brand of knives, however, aside from the risk of loss during shipment or damage during handling, if you have to ship your knives to be sharpened then you are less likely to keep them sharp.
Typically, the process can take weeks before you get your knives back. There are professional sharpening services out there and professional chefs are the typical customers.
Since it can take some time to have your blades professionally sharpened and there is a hassle factor involved, we aren’t bashful about advocating sharpening your own knives.
How Many Stages?
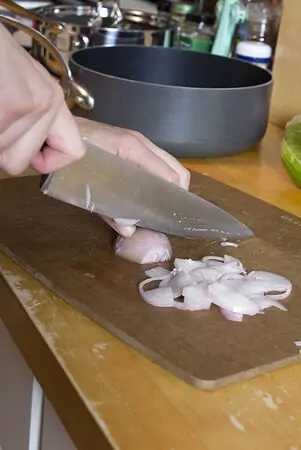
Most sharpeners have more than one “stage.” Each stage lets you sharpen the knife just enough, but not too much. So if you just need a quick touch up before you slice an onion or tomato, then you may be able to use stage 3 to finely hone the edge.
Most of the models come with two stages, coarse and fine, while the best models have three or more stages. The three to four stage models typically let the user sharpen very dull blades more quickly or enable the blades to be honed very finely.
Be careful about models with only 1 stage since they typically are fairly coarse and remove more metal than necessary and shorten the life of your knives. They aren’t bad or anything but you should be aware of the limitations. If you need to sharpen blades out in the garage (like pocket or utility knives), then a one-stage model may be the ticket.
The Abrasives
Most basic, economy models have composite sharpening stones and most models do have diamond-based abrasive stones.
It is typical to have a very fine or straightening stage made of tungsten carbide which serves the purpose of steeling the blade – that is to say the microscopic cutting edge is realigned and straightened.
What is the best kitchen knife sharpener?
This should be a subjective choice since each person’s needs will be a little different depending on their knives, interest in knives, interest in sharpening those knives, available budget for sharpening, and probably a couple of other matters that are specific for each kitchen chef.
And I think you know that I think an electric model is a way to go, mainly due to the speed of sharpening.
What about serrated knives?
Some models can sharpen serrated knives but the economic models usually will not so be sure you check the manufacturers’ documentation. Generally, you can touch up your serrated knives with great success by using to last or finest stage of an electric sharpener. To really sharpen each serration then you normally need around tapered sharpening rod, or you need a manual sharpening kit (like the Gatco 10005 or 10006).
One of the other advantages of electric sharpeners is that the angles are non-variable or fixed, providing a consistent and precise angle.

The Angles
Most electric sharpeners of high quality have a 20º or 15º sharpening angle, with a total of 40º or 30º inclusive. The 15º angle is designed for Japanese style knives while the 20º angle is for European style knives.
Lower quality sharpener manufacturers may not specify the sharpening angle. See my review on a great 15º sharpener.
Some models actually have a variable angle which you can adjust, but they stay put so you can sharpen for a session at the given angle. Now, these models are rarer and harder to come by, but here is one: Smith’s 50005 Adjustable Edge Pro Electric Knife Sharpener at Amazon.
The big advantage is you can sharpen your hunting knife, then your Japanese Sushi knife, and then your Wusthof Chef’s knife – all at the proper angle.
Most models have one angle and it is commonly 20º. A few specialty models are just for a specific kind of knife or brand of knife:
- Wusthof Electric Knife Sharpener exposes a fresh cutting edge monthly at Amazon.
- Chef’s Choice 316 Diamond Sharpener for Asian Knives sharpens to 15º to match most Asian made knives at Amazon.
- Chef’sChoice 15 Trizor XV EdgeSelect goes down to 15º as well at Amazon.
Do you have your ideal Chef’s Knife? If not, here are some that are a great value for the money.
The Top 5 Ratings
The Electric Knife Sharpener Review
Chef’s Choice 120 Diamond Hone 3-Stage Professional Sharpener (Best Home Knife Sharpener)

Key Features
- Three stages for high precision.
- 100% Diamond abrasives in the first 2 stages – that is for fast sharpening speed.
- Stage three is a honing stage with a combination purpose of stropping.
- Stage 3 is also a polishing stage too.
- It can sharpen your serrated knives.
- Chef’s Choice states that this is an all-purpose sharpener that will work well for the kitchen, garage, and even utility-type knives.
- Use Stage 2 for most of your normal sharpening.
- Stage 3 is for very dull knives.
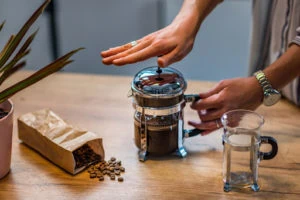
Work Sharp E5 Culinary

Key Features
- It’s made for the kitchen! There is a built in vacuum to keep the sharpening dust off your counters.
- Super easy to use since there are 3 preprogrammed settings. That means you’ll actually use the sharpener and have a sharp knife in 90 seconds.
- Out of the box it sharpens at 17º which is a versatile angle for most knives.
- It comes with a ceramic honing rod with 2 grit levels.
- The honing rod has a little wheel shaped like a spur which put microfacets on the edge of the blade. The micro facets provide “bite” so when you cut a tomato or bell pepper, the blade won’t slide around on the skin.
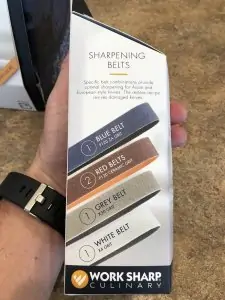
And if you get the CPAC004 East and West Guides Upgrade Kit (see at Amazon), then you can sharpen at 15º and 20º too. I did that since I’m obsessed with my European and Asian style blades. So I can get my Shun to 15º which is a bit sharper than the factory 16º angle.
The upgrade kit also comes with extra belts so you have Coarse, Medium, Fine, and Extra Fine. So you can remove just the minimum amount of metal, thus, prolonging the life of your blade.
It uses belts (not discs) so you can easily replace them as needed. Other electric models will just wear out.
Like many other models, the E5 sharpens serrated knives, kitchen scissors, and heavy duty poultry scissors.
Wusthof 3 Stage Electric Sharpener

Key Features
- Made by Chef’s Choice to the specs of the World Renowned Wusthof makers.
- 3 stages to meet all your sharpening needs without sacrificing the longevity of your knives.
- It sharpens down to 14º – PEtec angle to match the Wusthof Premium line.
- Contemporary design with gray and silver housing.
- Stage 1 is for dull knives that need a good sharpening session. It is made with 100% diamond abrasives.
- Stage 1 creates a new edge, normally sharper than most factory edges.
- Stage 2 is also has diamond abrasives but refines the edge and smooths it out. It prepares the blade for honing and polishing.
- It may be too sharp of an angle if you have a lot of hunting, camping, or pocket knives. (Learn more about hunting sharpeners and field sharpeners.)
Chef’s Choice 320 Diamond Hone Sharpener

Key Features
- 2 stages, so there is less of an ability to sharpen very dull knives. You can still do it but it will take longer even with the diamond abrasives.
- The honing stage is 100% diamond.
- The M320 is capable of doing the job in the kitchen, and you can sharpen your sporting blades and pocket knives.
- The angle is slightly larger in Stage 2 than Stage 1 and that provides a compound angle. It is more durable and a compound angle will stay sharper longer.
- You can use stage 2 to sharpen serrated knives.
- Sharpens to 20º which is great from kitchen and sporting blades.
- This is a more economic choice and still delivers 90% of more expensive models.
Chef’s Choice Hybrid Diamond Hone Knife Sharpener

Key Features
- This is a 3 Stage model with a unique design from Chef’s Choice.
- The Culinary is a Hybrid model meaning it has an electric motor in Stages 1 and 2 to shape the blade. Stage 3 is manual.
- The 3rd Stage has a single slot with a proprietary criss-cross design. It is innovative and speeds up the sharpening process.
- The angle is fixed at 20º so that is a good compromise for an all-purpose sharpener.
- The 3rd Stage is manual – with pull-through functionality.
- This is a great economic value.
Presto 08800 EverSharp Electric Knife Sharpener

Key Features
- 2 Stages provide fast sharpening sessions.
- The 1st stage shapes the precision angle.
- The 2nd and final stage hones and polishes. It is a much finer grit, i.e. less coarseness, so it is perfect for finishing up your blade.
- The angle is about 20º which is a good compromise between angle options.
- The 20º angle can service the kitchen knives that you have, as well as your pocket knives.
- If you have a lot of Asian and Asian-style knives, then you should consider a different sharpener since you need a 15º angle for most of those. Check out the Wusthof listed earlier if you need to sharpen Asian-style knives.
What Sharpener do I recommend?
Well, like all good questions, the answer is, “It depends.” You need to think about your needs and what knives you need to sharpen. You also need to think about your budget.
On a budget…(and few Asian-style Knives)
If you have a limited budget and don’t have any Asian knives, then I would go for the Presto 08810 EverSharp (get the latest pricing info at Amazon). You can usually find it for a decent price tag, and if you read some of the reviews that are out there you can see that almost everyone is very happy with it.
On a budget…(and many Asian-style Knives)
Chef’s Choice 316 Diamond Sharpener (for Asian knives) for Asian Knives. I have a lot of Asian-style knives so this is pretty important to me. And, I have a couple of German knives that I sharpen to a 15º angle because I like sharp things! So, if you need an economic choice for your Asian-style knives, then check out the Chef’s Choice 316 Diamond Sharpener for Asian Knives. You can normally get it for a low to mid-price tag, and it does a perfect job on a 15º angle.
Best Value Knife Sharpener: Premium Electric Sharpener
This is the price point to get premium features and three stages. The three stages give you more versatility in what you can sharpen. The Chef’s Choice 120 Diamond Hone at Amazon will take care of basically all of your blades. It sharpens to a compound angle so you get the durability of a 20º and the sharpness of a 15º angle. You can use the 3rd stage for touching up your serrated bread knives, or for a quick honing session before you julienne carrots.
Overview of Knife Angles
If you have a knife set and are in the market for a sharpener, it is critical to understand the distinction between the different angles.
Trizor XV

Sharpeners like the Chef’s Choice 15 Trizor XV EdgeSelect Electric Knife Sharpener at Amazon have three sharpening stages to provide a durable, professional edge to your blades. This will give you an edge that will stay sharp much longer than a single stage knife sharpener will give you.
M1520
If you have both western and Japanese style knives, it’s important to know that electric knife sharpeners such as the Chef’sChoice 15 Trizor XV EdgeSelect Professional Electric Knife Sharpener for Straight and Serrated Knives at Amazon are able to adjust between the fifteen-degree edge for Japanese style knives and the twenty-degree edge for western style knives at the flip of a switch. This can save you money and counter space.
Wusthof 2933 Sharpener
This one is actually made for the Wusthof line of PEtec knives. (See the full review) The PEtec are at 14º so that’s pretty darn close like you can’t tell a difference close.
So, if you are a purest for 15º, skip this one…
2933 is made by Chef’s Choice so you can pretty much expect the same functionality and quality.
It has 3 stages and works fast, so it meets our criteria. 2933 is the perfect option for people with a few Wusthof knives and some Japanese knives.
KAI Knife Sharpener

The Kai Electric Sharpener provides the easiest way to keep your Japanese-style knives razor-sharp and in tip-top shape. This electric sharpener from the makers of Shun cutlery has slot guides that automatically set the sharpening angle to the correct 16 degrees that Japanese knives have. It is so easy and effortless to use. Yet, it will give you professional grade sharpening every time.
It is compact and thus will take up very little space in your kitchen counter or cabinet. This electric sharpener can be used on stainless steel, carbon steel, and clad steel knives.
It is primarily designed for Kai and Shun knives that are best known for their composite double-beveled blades. However, it is not suited for single-bevel, ceramic, serrated or titanium knives, or scissors.
Pros:
- Best for sharpening 16-degree double-bevel knives
- Sharpening slots that automatically set to the correct sharpening angle
- White Alundum whetstone provides quick and easy sharpening
- Anti-slip rubber pads allow maximum stability on smooth surfaces
Cons:
- Not intended for single-bevel, ceramic, serrated, or titanium knives
How much will an electric knife sharpener cost?
Like so many things in life, you get what you pay for.
There is a very, very large range of prices. Some have a low price tag (like this one) and the top choices are as high as several hundred dollars (like this Wicked Edge setup).
Like so many things in life, you get what you pay for.
If you’re downright obsessive about your knives (like me) & have many different kinds, then you may end up selecting a sharpening system that has the capability to use many different kinds of sharpening stones
Some of the best sharpeners are the most expensive but they may be easier to use, provide a higher quality sharpness, or use higher quality materials. If you browse at Amazon, then you can see that the vast majority of the knife sharpeners are a bargain.
I believe the best value and bang for the buck is in the medium price range for the majority of consumers. If you are a knife lover and will get plenty of use out of a sharpener, then the higher price range is probably right.
Now, if you’re downright obsessive about your knives and have many different kinds, then you may end up selecting a sharpening system that has the capability to use many different kinds of sharpening stones.
Why do blades become dull?
Even the very best edges, made from the finest steel, become dull over time and through use.
It is a fact of life.
Here is how it happens:
The microscopic edge of the blade becomes misaligned and folds over, so instead of one sharp edge of metal you end up with a microscopically jagged blade.
This happens slowly over time and the quality and hardness of the metal have a direct impact on how quickly the blade becomes misaligned. The cutting surface also plays a very big role in how fast an edge dulls – so don’t use a glass cutting board or cut on top of your marble countertop!
How can I tell if my knife needs to be sharpened?
As mentioned earlier, when honing is not making an improvement to the use of the knife, then it is time to sharpen.
If the blade does not cut cleanly and quickly, as expected for the application, then you need to sharpen the edge.
A chef’s, or another kitchen knife, should be able to cut fruits and vegetables with nearly no downward pressure as if gravity is the only downward force needed.
Maybe not a hard carrot or a large potato, but the blade should be able to glide through a zucchini, onion, or apple.
What are the different types of knife sharpeners?
Knife sharpeners fall into a few different categories and we can divide them up a couple of ways. There are manual knife sharpeners and electric knife sharpeners.
Both types of sharpeners use a specific material to remove metal from the knife blade, usually stone, ceramic, or diamond.
There are a few kinds of sharpeners out there. Electric, a simple whetstone, & a manual sharpening system are shown above. Regardless of the type, the sharpening material has varying grits, ranging from very coarse to extremely fine.
Coarse materials remove the metal very quickly, which is useful for very dull blades or when reprofiling an edge to another angle (More on reprofiling later!).
The finer grits are used later in the process, much like sanding down a piece of wooden furniture.
The very finest grits do nothing more than polish the metal to a gleaming shine.
Manual Knife Sharpeners

The simplest of the manual knife sharpeners are a solid block of the sharpening material. Originally, these were just very hard stones that were abrasive and hard enough to remove metal from the blades.
King Two Sided Sharpening Stone with Base – it even has two grits.
Some areas of the world, like Japan, India, or even Arkansas, have geology that lends itself to many useful stones for sharpening. These stones were often lubricated with water (like the whetstones from Japan or oil (like the stones from Arkansas).
In modern times, composite and synthetic materials are often used and can be less expensive to purchase than actual stones. These synthetic sharpening stones are usually made from aluminum oxide.
Other composites may have some industrial grade diamond dust and particles in the stone which helps to take the metal off the blade even more quickly.
Top Choice: Smith’s Arkansas TRI-HONE Sharpening Stones System at Amazon
Pros:
- Simplicity. This is what our ancestors used to sharpen their blades and there is a therapeutic process.
- Full flexibility for reprofiling a blade to any angle.
- A diverse range of stones, grits, and quality.
- No moving parts and very low maintenance.
- Has the ability to sharpen the smallest and largest blades, think a mini pocket knife to a machete.
Cons:
- Stones from exotic locations might be expensive.
- The user must practice and hone his or her craft to ensure the angle of the blade is constant.
- This is probably the most labor intensive and requires the most time to sharpen a blade.
Cost: Low to Mid-Range
Target User: The knife aficionado with lots of time to dedicate to the craft of blade maintenance and sharpening.
Manual Knife Sharpener Systems
Knife sharpening systems help the user keep a constant angle when sharpening the edge. This is a huge advantage in sharpening since the angle is enormously important.
In short, the single job of the knife sharpener system is to keep the angle of the edge constant.
If the angle is not kept constant the blade may not be as sharp as it could be and the edge might actually have varying levels of sharpness.
In short, the single job of the knife sharpener system is to keep the angle of the edge constant.
Typically, these knife sharpener systems have some kind of guide rod and angle specifications so that the user can safely and easily keep the angle constant while sharpening.
Lansky, Gatco, and Spyderco sharpeners have guide rods while Edge Pro, Inc. uses a slightly different design.
My personal choice: Wicked Edge Pro-Pack I at Amazon
Pros:
- Generally simple with no external power required.
- The angle of the blade to the stone is fixed which leads to a very uniform angle.
- Some flexibility for reprofiling a blade to any angle. Each manufacturer may have a different set of angles for their version.
- A wide range of stones, grits, and quality. Again this depends on the manufacturer but generally, a wide range of high-quality stones are available, including diamond.
- Low maintenance with a few moving parts. Generally, very simple mechanically.
- Easier to learn how to sharpen than with a simple whetstone.
Cons:
- Stones from exotic locations might be expensive.
- The second most labor intensive.
- Some versions have difficulty holding small blades, such as a small pocket or paring knives.
- Eventually, the sharpening stones in the system will need to be replaced. You would have to sharpen a lot of knives but they will wear out.
Cost: Low to Mid-Range
Target User: The knife aficionado with some time to dedicate to maintenance and sharpening. This is the recommended knife sharpener for someone with an interest in reprofiling his or her blades.
Manual Pull Through Sharpener
These sharpeners, as the name implies, require the user to pull the knife through the sharpening area.
These sharpeners are usually very inexpensive & you will see them for sale around the holidays. Great stocking stuffers! See the Wusthof Precision Edge 2 Stage Sharpener
Many of these sharpeners are multistage, meaning there are different grits available. The most coarse will remove the metal the fastest and the final stages will smooth out the roughness of the coarse stages.
Two stages are most common but some sharpeners have up to four stages.
Typically, a pull through sharpener has a fixed angle so there are little flexibility and many times the manufacturer does not specify the angle.
If you get the same brand of sharpener as your knives, then you have a pretty good chance of having the matching angle.
Pros:
- Generally simple with no external power required.
- The angle of the blade to the stone is fixed which leads to a very uniform angle.
- Low maintenance with a few moving parts. Generally, very simple mechanically.
- Easier to learn how to sharpen than with a simple whetstone.
- Require a small amount of time to touch up an edge.
- They can sharpen large and small blades in the most common sizes.
- Small in size so they are very easy to keep in the kitchen.
Cons:
- There is a sparse selection for the types of stones available. You can get a higher end model with higher quality stones.
- No ability to reprofile blades.
- Some models only have one stage which makes the sharpening process slower.
- You probably cannot fit your machete in the majority of these units.
- After a certain point in a knife’s life, these do not really sharpen so well and the blade needs to be sharpened with a sharper angle.
Cost: Low to Mid-Range
Target User: The average kitchen user that is not too concerned if their blade isn’t so sharp and just needs an occasional touch up between major sharpening maintenance. I have one of these that I received as a gift and I do use it occasionally.
It does help a bit but I think a high end sharpening steel (also known as a honing steel) might do a similar job. My specific model has a scissor sharpening feature which works pretty darn well!
Top Choice: Wusthof Classic Precision Edge 2-Stage Sharpener at Amazon
Electric Knife Sharpeners
Electric knife sharpeners have a similar design to the manual pull through sharpeners, but the key advantage is the electric versions have the sharpening stone attached to a motor.
For kitchen applications, electric sharpeners are ideal. There is a wide range of quality and features for electric knife sharpeners based on what materials are used for the sharpening stones. The best models have three to four stages – like the Chef’s Choice 120
The result is a very convenient way to quickly sharpen your knives.
The convenience factor is huge when you compare the effort required to send your knives back to the manufacturer and wait 4 weeks versus two minutes of sharpening using an electric knife sharpener.
For kitchen applications, this type is sharpener is nearly ideal in most cases.
There is a wide range of quality and features for electric knife sharpeners based on what materials are used for the sharpening stones. The best models have three to four stages.
The downside is that the angles are fixed and non-adjustable. Again, for typical kitchen applications this is no problem at all, but for tactical or survival blades you might want more flexibility.
If you’re a knife lover, like me, then you might want to have the flexibility to reprofile your edges and improve upon the factory sharpness.
Pros:
- Fast sharpening action, usually in just a few minutes.
- The angle of the blade to the stone is fixed which leads to a very uniform angle.
- Low maintenance with a few moving parts. Some versions need to have the metal dust removed periodically.
- There are some higher end models that do have multiple stages which would help to sharpen edges more quickly when they are very dull.
Cons:
- No ability to reprofile blades.
- Requires electricity.
- After a certain point in a knife’s life, these do not really sharpen so well and the blade needs to be sharpened.
Cost: Low to Mid-Range
Target User: The average kitchen user with little time to dedicate to sharpening but needs to have a sharp blade. There are several models out there that have some nifty features that may be appealing for people with a wide range of knives also – pocket, survival, hunting, or high end kitchen knives.
The best models have two angle options, 15° and 20°, with at least three separate stages.
Chef’s Choice Model 1520 AngleSelect Diamond Sharpener
What angle should I sharpen knives?
The right angle for any given knife depends on the application. In addition, your tool for blade sharpening may dictate what angles you can sharpen to.
Some of the high end electric knife sharpeners do provide more than one angle to sharpen to, typically 15º and 20º, however most only sharpen to one single angle of 20º. For full flexibility, you would need a bench stone and you could sharpen to any angle you desired.
A good compromise is a sharpening system with an angle guide, such as the Lansky or Gatco kits, that usually have angles for all typical sharpening needs.
One might think that the sharpest angle possible is the best.
For full flexibility, you would need a bench stone and you could sharpen to any angle you desired.
However, the tradeoff is that the sharper the blade, the more delicate it is and will require more maintenance and sharpening.
If that was not the case, then every blade from a straight razor to an axe would be sharpened to 12º.
Sushi requires a very sharp knife. A less-than-razor-sharp knife won’t be fun to use… and you will end up smushing your rolls when you cut them.
Generally speaking, razors, paring, and fillet knives should be the sharpest of your edges at an angle of 12º – 18º.
Most kitchen blades, like utility/slicing, chef’s, boning, or carving knives, should be sharpened to 15º – 25º.
The exceptions are Japanese style knives that are usually sharpened to 14º – 16º depending on the knife maker.
The sporting category, including pocket, survival, and hunting knives, sees more intense action and should be sharpened to the 25º – 30º angle range.
The less sharp angle means there is more metal there to cut, thus providing more durability out in the field.
Lastly, a machete or ax should be sharpened down to 30º – 40º providing even more ruggedness and longer lasting sharpness.
There is also the matter of the blade material.
The harder the metal, the sharper the blade can handle while still having durability.
The angles listed do hold true but if you have a very high quality chef’s knife, you could definitely push the limits and sharpen to a 12º angle, knowing that you would need to sharpen more often and probably warn any house guests that use that knife.
For the sake of argument, let’s focus on kitchen knives.
To dig a little deeper into the steel, many manufacturers of fine kitchen knives, like Shun, Wusthof, Henckels, Global, etc…, use a proprietary steel blend.
Often times, this is printed on the blade and may seem cryptic – X50 Cr MoV 15.
It’s really cool that they put that information on there but what the heck does it mean?
From the Wustof website, we see that that it means:
- X: Stainless Steel
- 50: 0,5 % carbon- the carbon content is significant for the sharpness
- Cr: Chromium for stain-resistant properties
- Mo: Molybdenum enhances the stain-resistant properties
- V: Vanadium for hardness and edge retention
- 15: Contents of chromiumin % (15%)
Essentially, other metals are blended with the steel to obtain some better qualities. However, those benefits are not without trade offs.
The good thing is that the steel is optimized for the kitchen and general durability.
The downside is that the steel is softer than it really could be and that means the edge of the blade cannot hold as sharp of an edge as it could otherwise.
Since the metal is softer, it is easier to sharpen but it also will dull a little bit faster also. In general, these high end kitchen knives are in the 52º to 58º on the Rockwell scale. The Wusthof steel blend list earlier is 58º on the Rockwell scale.
Many Japanese made knives as well as custom made knives are in the low 60s, 61º to 63º on the Rockwell scale. For example, the Tojiro Senkou brand has blades with a hardness of 61º.
The Best Knife Sharpener for Kitchen Knives
For the kitchen chef, you want to spend your time cooking and eating not laboring over your knives for 30 minutes.
This sharpener is made by Chef’s Choice so you know the quality is high. It comes with a 3-year-warranty & is assembled in the USA.
We select the Wusthof 3 Stage Electric Knife Sharpener because of the very sharp cutting edge that this sharpener provides.
This sharpener boasts three stages with the finest being a honing stage. The kicker is that the Wusthof sharpens to an angle of just 14°!
That’s really sharp folks, so sharp, in fact, that if you have other knives that require more durability then you might want to look for another sharpener.
So if you have a pocket knife, survival knife, or cleaver, an edge of just 14° would not stay sharp for very long.
The target user for this sharpener would be a person with high quality blades, made with a high quality blend of steel – Japanese style knives are perfect candidates.
This sharpener is made by the Chef’s Choice makers so you know the quality is high. It comes with a three year warranty and is assembled in the USA.
The Wusthof won’t be sliding around on your counter when you are sharpening since it weighs about 4.8 pounds.
The Best Knife Sharpener for Survival Knives
A prepper or survivalist needs to have the versatility of a manual sharpening system without relying on electricity. We select the Wicked Edge Field and Sport since it can sharpen from a razor sharp 15° to a durable 30° in 2° increments.
You could sharpen your straight razor, survival, pocket, folding, serrated, paring, chef’s, or pretty much any other knife you may have.
The kit comes with a portable carrying case and a range of stones in 100, 200, 400 and 600 grits.
Aside from those points, the Wicked Edge Field and Sport has innovations and improvements over other sharpening systems…
…such as the neoprene padded jaws so you don’t have to worry about scratching up your high quality blades and the one knob clamping mechanism that makes clamping down your blade very user-friendly.
The Best Knife Sharpener for a Variety of Knives
Maybe you have a full range of kitchen knives because you are a bit of a foodie and you like camping and hiking so you also have several pocket, camp, and survival knives.
I fall into this category myself and I think most people probably do have a variety of knives, at least the people that have read this page.
You need to ask yourself a question:
Would you like to spend a little time bonding with your knives in a therapeutic sharpening session or would you rather spend about two minutes per blade?
You may also want to think about whether you want to have full flexibility to re-profile any of your edges.
They are not trick questions but you will need to think about your needs and how much time you can dedicate to sharpening.
If you want a longer sharpening session & time to bond with your knives:
The Edge Pro Apex 3 Knife Sharpener Kit is the best knife sharpener for you.
It comes with five water stones ranging from very coarse to very fine and a ceramic hone.
The Apex 3 is capable of sharpening to a variety of angles, letting you take any blade to the optimal sharpness – 10°, 15°, 18°, 21°, and 24°.
The wide range of stones let you sharpen very dull blades quickly.
This sharpening kit even comes with a instructional DVD and carrying case. All Edge Pro Sharpening Systems are Made in the USA.
If you don’t want to spend too much time sharpening:
The Chef’s Choice 1520 AngleSelect Diamond Hone Electric Knife Sharpener is the best knife sharpener for you.
This is one of the few electric sharpeners on the market that is capable of sharpening two different angles, enabling the user to sharpen a blade to a double beveled edge.
Very cool.
This sharpener is capable of sharpening a blade to 15° or 20° depending on the usage.
Typically, Japanese style knives will be sharpened down to the 15° angle and European and American style knives are sharpened to 20° coming out of the factory depending on the manufacturer.
The three stage sharpening system features diamond abrasives and patented flexible stropping polishing discs that create a double beveled edge, reminiscent of a gothic arch, edge structure recognized for incredible sharpness and durability.
It comes with a three year warranty and is assembled in the USA.
The Chef’s Choice 1520 AngleSelect Diamond Hone Electric Knife Sharpener won’t be sliding around on your counter when you are sharpening since it weighs about 5 pounds.
What is honing? What tool is used to hone a knife? How do I hone my knife?
Honing straightens the misaligned edge of the blade.
Despite the name, “sharpening steel,” the tool does not sharpen the blade.
It is best to hone your knife every time you use it – just before cutting and after you wash and dry the blade.
A sharpening steel is used to hone a knife and is usually a cylindrical rod, roughly about 12 inches long.
Some sharpening steels have a flattened area.
Most sharpening steels are made of hard steel, but some are made of ceramic.
To hone your knife, you run the business side of the blade across the sharpening steel to get the blade edge back in alignment.
Despite the name, “sharpening steel,” the tool does not sharpen the blade.
Honing is also done as the last step of sharpening.
What is sharpening and how is it different from honing? When should I sharpen a knife?
Sharpening is differentiated from honing because metal is being removed from the blade and a new cutting surface is being created. Once honing ceases to be effective to improve the cutting experience, it is probably time to sharpen the blade.
A very good, high quality blade may only require sharpening once a quarter under the same use.
The intervals between sharpenings varies and it depends on how often and how hard you use your knife, plus the type of metal in the blade.
You may need to sharpen a cheap, inexpensive knife very often, like every 10 – 14 days, if it sees heavy use.
A very good, high quality blade may only require sharpening once a quarter under the same use.
What is the best kind of cutting board to help keep your knives sharp?
The best kind of cutting board to use to keep your knives sharp is an end grain cutting board.
These cutting boards take more effort to make and are correspondingly more expensive, but the upside is that they do not dull edges nearly as quickly as other types of cutting boards.
End grain cutting boards are made of pieces of wood, and the blade comes in contact with the end of the grain rather than cutting across the grain.
Imagine cutting a tree down versus splitting logs into firewood.
This lets the blade slide between the vertical grain rather than cutting the grain perpendicularly, which is gentler on your knife edge. The next contender is a plastic and composite type cutting board.
These are fairly soft and do not tend to dull the blades too quickly.
They are generally cheaper than the end grain cutting boards and have the advantage of being dishwasher safe in most cases.
Most of the time they are more durable than a wooden cutting board.
Bamboo Cutting Board Wooden cutting boards are next and we are talking about the non-end grain wooden cutting boards.
In these cutting boards, the grain runs across the cutting surface.
As discussed earlier, this is harder on your edge because the knife hits the grain at a perpendicular angle.
Plain wood cutting boards are usually pretty cheap and can be found at almost any department or grocery store.
Unlike the plastic cutting boards, a wooden cutting board should not be washed in the dishwasher – the heat, moisture, and intense cleaning environment can destroy a cutting board.
The worst kinds of cutting boards for your knives are marble or glass. Each cut drastically impacts the sharp edge of the blade, dulling with each successive impact.
I have seen more than one sharp knife be noticeably dulled after just one chopping session on a glass cutting board.
Steer clear of these types of cutting boards for cutting and dedicate their use to serving cheese, fruit, or crackers.
Knife Storage
How should you store your knives? Storage is a critical point when you consider ways to keep your knife sharp.
If you store your knives in a drawer (like I used to), then you are subjecting your precious blades to a harsh environment where they can become damaged.
Knives in a drawer are bumped into by other utensils, gadgets, and anything else that is in the drawer.
Poor storage of knives is one of the top reasons for damage.
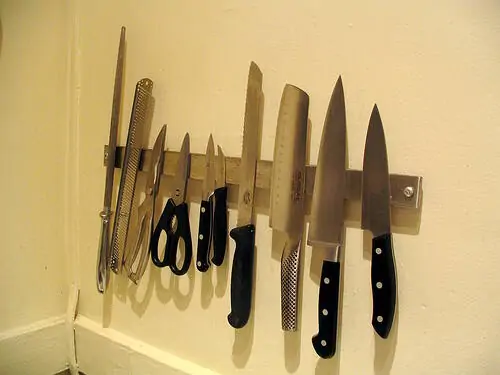
The best way to store your knives is on a magnetic strip.
My current favorite is an elegant solution from an expert woodworker in California, USA. The M.O.C. Magnetic Knife Strip was developed and created by Aaron Weinstock, the founder of M.O.C. Woodworks. M.O.C Magnetic Strip is a great looking way to hold anything made of metal.
Some people do prefer to keep their knives in wooden blocks which is fine. However, I just wish I could clean inside the knife slots.
How To Use The Chef’s Choice M130 Electric Sharpener: A Guide
This is a tutorial based on the very popular M130 by Chef’s Choice. Not all electric sharpeners are use exactly like this but it should give you a great idea about actually using one. This M130 is a premium model and is an update of the M120 list.
Here we go… I referenced the Chef’s Choice Manual extensively so you can find a link to it below if you want to go to the source.
Getting Started
The oil’s beginning to sizzle and you’re all set to slice up some steak for dinner, you open up your knife drawer, and 10 different knives look up at you.
Which one is sharpened and ready to go?
Grab one, nope that doesn’t cut it. Try another, still no!
The Chef’s Choice M130
Wouldn’t it be nice if there was a knife sharpener that tunes each knife for the job at hand? Behold! Enter the Chef’sChoice® Sharpening Station Model 130. (See the M130 at Amazon.)
3 Stages For Maximum Versatility
This little gem has 3 stages of sharpening that let you take any knife and craft the blade specifically for the job at hand. Anything from big slices laid up for butchering to the finer touch of gourmet preparation. This knife sharpener will make sure you’re always covered!
As mentioned, the Model 130 has 3 stages, and this guide will walk you through when and how to use each stage by itself, or paired with the others to create an unbelievably sharp edge that will transform you into a pro in the kitchen. So let’s dive straight in and introduce the 3 stages:
The Big Three
The Model 130 brings out the big guns right away with a diamond coated disk in Stage 1. For all your inner geologists, diamond is the hardest mineral on earth according to the Mohs Scale. So imagine the sharpness of your knives after a few passes on that!
Stage 1 – For Very Dull Blades
Due to the fact that your knife, compared to diamond, is composed of very soft metal, every pass you make on Stage 1 against the diamond disk scrapes tiny particles of metal off the knife.
Removing this blunt or damaged metal paves the way for you to hone it in later stages.
However, due to the fact that Stage 1 removes material from your knife, you’ll use it very infrequently. After using Stage 1 for a single heavy duty sharpening session, Stages 2 and 3 will be your go-to for standard sharpening thereafter.
Stage 3 – Steeling (or Blade Realignment)
Stage 2 is where we can begin to diversify the sharpening technique based on what you need.
Remember that long steel rod that came with your knife set?
That’s Stage 2, designed to precisely align your blade for a professional cut! Nice and compact for your easy use, without the risk of doing someone an injury while swinging a long steel rod in one hand and a knife in the other.
Another factor that launches Stage 2 ahead of a standard steel are those 2 handy guide slots for the left and right sides of your blade. These slots are perfectly angled to ensure proper contact between the blade edge and the miniature rod, and this in turn creates razor sharp micro-serrations. Trying to hit this sweet spot angle on your own takes tremendous skill, and if you miss by just a little bit all you’re doing is dulling the blade, or simply rubbing the face. So why not use Stage 2, eh?
Stage 3 – For Honing and a Razor Sharp Polishing
Stage 3 is the honing step. Inside are polishing disks made from ultrafine abrasive material that take the blade, already sharpened in Stages 1 and/or 2, and remove any excess material to refine the edge for the razor sharp finish you need to complete the task on hand.
Cleaning Mechanism of Electric Sharpeners
The Model 130 also comes with a convenient cleaning mechanism to keep Stage 3 performing perfectly for years! It removes any grease or imperfections that may develop, and we give detailed instruction on how to use it in the maintenance section later in this guide.
Proper Technique to Use When Sharpening Using an Electric Sharpener
Before we get into the different sharpening steps, we’ll first cover the proper technique to use when sharpening.
Whether you’re using Stage 1, 2, or 3 always start with the power switch for the Model 130 facing you, this is the front side. Also begin each stroke by inserting the blade as close to the handle as possible, and pull through the sharpener at a steady pace.
Always pull the blade through the sharpener towards you, never push it away!
Using an Electric Sharpener for Curved Blades
For curved blades, tilt the handle upwards as you’re pulling through in order to keep the edge of the blade in contact with the sharpener throughout the entire movement. This same rule applies to every blade you sharpen and every stage you use. Also keep the knife edge in contact with the sharpener to keep a uniform blade!
How Long to Pull For a Chef’s Choice Sharpener?
As for speed, the standard practice is a 4 second pull for a standard 8-inch blade.
So a steady, deliberate, pull is what we’re looking for here. Don’t whip the blade through at the speed of light, but also don’t go so slow that rust will form on the other end before it reaches the sharpener.
Lastly, you’ll notice that each stage of the Model 130 has 2 slots. This is designed to sharpen the left and right sides of your knife edge equally. With that in mind, always complete the same number of pulls on the left and right sides. Therefore, for the rest of the guide we will refer to ‘pairs’ of pulls, this means to complete 1 pull on the left and another on the right.
Standard Sharpening Using the Chef’s Choice M130
When you’re ready to begin sharpening, turn on the power and start with Stage 1.
- Insert the blade into the left-hand slot.
- Push down until you feel the blade contact the diamond disk.
- Pull the blade towards you in one steady motion.
- Switch to the right-hand slot and repeat.
- Generally, 2 pairs of pulls are sufficient to move onto the next step.
How Much Pressure to Use on an Electric Sharpener?
As for the pressure to put on the blade, take it easy!
Remember us talking about how diamond can eat knives for breakfast?
Once you feel the blade touch the diamond disk, exert just enough pressure to maintain that contact.
The harder you press, the more metal will get scraped away by the disk.
Don’t worry, you’ll always get the sharpness you’re looking for with just a little pressure!
Check For The Burr On The Blade
Once you’ve completed your pulls, check for a burr on the side of the blade that you completed your last pull (if your last pull was in the right slot, the burr will be on the right side of the blade).
To complete this check:
- Simply place your figure on the flat of the blade and slowly move it down towards the sharpened edge.
- Just as your finger reaches the sharpened area you should feel that the edge is slightly bent or feel a rough line.
- If you find this burr, you’re good to go and can move on to the next step.
- If not, complete a couple more pulls on Stage 1 and repeat the check.
When you’re looking for this burr, please remember to start on the flat of the blade and move your finger down!
Running your finger along the knife edge like they do in the movies is much more likely to end with a trip to the Band-Aid station.
Skip Stage 2
For the standard sharpening process, we’ll skip Stage 2 for now and jump straight into Stage 3. As with Stage 1, press down gently to avoid wearing down the honing mechanism.
Move to Stage 3
Only 2 pairs of pulls are needed on Stage 3 to create a sharp edge that can tackle the majority of your food preparation needs. If you’re looking for a few extra fancy points with gourmet preparation, then give the blade a couple more pulls on Stage 3. Go ahead, pluck that hair and with dramatic flourish, slice it in midair, that’s how sharp your knife is now!
On the flip side, if you’re cutting very fibrous or stalky foods, then only a single pair of pulls will be sufficient to prepare the blade in Stage 3.
This process of using Stages 1 and 3 will produce an exceptionally sharp blade that far exceeds any factory produced sharpness!
What About Touching Up the Knife With A Honing?
However, with continuous use, the time will inevitably come when it’s time to re-hone the blade.
When that time comes, always start with Stage 3. You want to hone and sharpen without scraping off metal each time, right?
So give the blade a couple pairs of pulls through Stage 3 and check the sharpness.
If you’ve put the blade through the ringer, and Stage 3 can’t quite make the cut for re-sharpening, then it’s safe to return to Stage 1 and begin the sharpening process again.
Always remember you need your Model 130 powered up for Stages 1 and 3!
Knives of Steel – What about Stage 2 of the Electric Sharpener?
So far we’ve left Stage 2 out of all the fun, but now it’s time for some steeling action!
As mentioned earlier, this Stage contains a miniature steel rod similar to the ungainly steel rod that comes with most knife sets.
Since this rod remains stationary during the steeling process, the Model 130 does not need to be turned on to use this Stage.
How To Hone (or Steel) A Knife Using Stage 2 of a Chef’s Choice Sharpener
To steel knives for the first time, sharpen normally using Stage 1 as we covered earlier.
- Now take the sharpened blade and insert into the left-hand guide slot of Stage 2.
- Keep the face of the blade on the guide surface.
- Insert up to the handle.
- Press down until the blade just kisses the steel rod.
- Then pull the blade towards you in a steady motion.
- Keep contact between the blade and rod for the entire motion!
Once again, it’s important to emphasize that pushing harder on the blade doesn’t make it sharper!
The key is to maintain consistent contact between the blade edge and the steel. So when you place the blade in the slot, push just enough until you feel it contact the steel, and then start your pull.
It will take about 10 pairs of alternating pulls to fully align the blade and create micro-serrations along the entire edge. You now have a perfectly steeled edge. Go forth and conquer the world of fine cutlery!
Normal Blade Wear
As with any blade, the ‘bite’ will wear off with continued use. However, before submitting to the knee-jerk reaction of throwing the knife back into the heavy duty sharpening of Stage 1, give it about 10 pairs of pulls on Stage 2.
Generally, this steeling process will return the blade to it’s former glory by realigning and removing any imperfections developed during use.
What if Stage 2 Takes Too Long on my Electric Sharpener?
If you feel that it is taking too many pulls on Stage 2 to develop the sharpness you need, then go ahead and return to Stage 1. Follow all the instructions we’ve already covered for Stage 1, and then return to Stage 2.
Stage 2 Vs. Stage 3 of a Chef’s Choice Sharpener?
You’ve undoubtedly noticed that Stage 3 was been left out of the steeling process. This is due to the fact that Stages 2 and 3 produce 2 very different types of sharp edges.
Stage 2 produces a steeled, razor-sharp, edge by creating micro-serrations along the length of the blade as the softer metal is evened out against the strong steel miniature rod. You won’t be able to easily see or feel these micro-serrations, but trust us, they’re there!
Stage 3 on the other hand produces a perfectly honed, polished, and smooth edge that is ideally suited for filleting or gourmet food prep. If you wish, you can give a steeled blade a very quick swipe on Stage 3 to polish the micro-serrations, but beware! Pressing too hard and too many passes will simply remove the micro-serrations.
Serrated Sharpening: How to Use a Chef’s Choice Electric Sharpener on a Serrated Knife
The Model 130 isn’t restricted to simple, standard, blades.
If you have a serrated knife, like a bread knife, that is no longer pulling its weight in the kitchen, then you can sharpen it using Stage 3.
Serrated blades are made up of several tiny teeth that work very well for cutting into tough husks or cardboard.
However, never try to use Stage 1 to sharpen these blades! You’ll end up just grinding these teeth off.
Therefore, give the serrated blade about 5 or 6 pairs of alternating pulls on Stage 3, using the same procedure we covered earlier. This will re-align all the little teeth that are present on the blade, as well as sharpen them.
How to Sharpen Kataba Blades
If you happen to own a Kataba style blade that needs a little attention. Then look no farther than Stage 2, but there is a trick!
These particular blades are beveled on only 1 side of the blade edge.
Essentially, this means that only 1 side of the blade has the angled, sharpened, appearance while the other side looks uniformly flat.
Therefore, when you use Stage 2 to steel your Kataba knife, first identify the beveled side. Steel this side normally as described in the section earlier.
However, when it comes to the non-beveled side, apply even less pressure to the steel.
This means that the non-beveled side is barely touching the steel! We just want to keep it in contact to help with the overall blade alignment.
Maintenance for a Chef’s Choice Sharpener
Using Stage 2 for steeling only engages 1 section of the miniature steel rod. With use, this section can wear down slightly and lessen the effectiveness of your steeling procedure. If you notice this, simply insert a coin or flat-head screwdriver into the slotted cap at the top of the rod, rotate 1 click, and viola! You have a brand new surface of the steel rod ready to go!
When Should You Clean the Chef’s Choice Sharpener
When you notice that Stage 3 is no longer honing the blade quite like it used to, then it’s time for a clean!
You should only need to complete this about once a year.
How To Clean the Chef’s Choice Sharpener
- Turn the Model 130 around, and locate the lever on the lower left corner on the back side.
- Turn on the power and turn this lever to the right, and hold for 3 seconds.
- Then turn to the left and hold for another 3 seconds.
- This motion activates the dressing tool that removes any grease, food, or other undesirables from the honing surface.
Pretty easy isn’t it?
Notes:
Before beginning any sharpening process, it’s best to remove all food, grease, and other material from the blade before inserting into the Model 130. This not only helps give your blade an impressive edge, but it will help prevent your sharpener from wearing out earlier!
Always follow the speed and pressure recommendations that we emphasized earlier. Harder does not equal sharper here, and will simply eat away at your knives.
The instructions we’ve provided cover standard metal knives, serrated, and Kataba blades. Do not try to sharpen scissors or ceramic knives with the Model 130 as they are manufactured differently and have drastically different material properties.
References: Chefs Choice, The M130 Manual
Review of the Presto Eversharp Professional Knife Sharpener (Model 08810)
Owning an electric knife sharpener becomes a source of personal pride in the same way owning a band saw does: few of your friends have one, want one, or know how to use one. But you have one, and so you find a million uses for it. And then you can’t live without it.
See it at Amazon: Eversharp Pro 08810
When I bought my electric knife sharpener, I did some online research. I told my sister about my purchase, and she said, “Why do you need one of those?” This from the woman who has a thousand-dollar sewing machine for her “quilted art.” I thought about her question. The truth is, I don’t need an electric knife sharpener, but the process that brought me to the decision to buy one led to only two options – pre-sliced vegetable and meat purchases, or buying an electric knife sharpener. It was that clear to me.
Why I needed a knife sharpener
The simple sad fact of life is that cutting with a sharp blade makes a sharp blade dull. In the course of making a salad, you may be chopping cabbage, spinach, lettuce, onions, and carrots, and slicing tomatoes and celery and other veggies. Then you cut the meat. One dinner can dull a brand new blade.
And once you’ve had to saw your way through cutting a tomato or you’ve flattened your loaf of freshly baked bread trying to get it sliced, you realize that you need a method for sharpening your knives.
My sister worried that I would “slice a finger open” if my knives were too sharp, but in fact, I had nicked myself many times by using a dull knife because I put weight on the knife with my hand, and when it slipped, it cut me.
History of sharp blades
Humans have always liked very sharp blades. Archeologists tell us that Neanderthals used finely honed flint blades to take down game and dress their kill. And primitive humans used similar methods and developed their own for making arrowheads, knives, and ax heads.
Sharp blades were a matter of life and death, and resharpening the blades was something every Neanderthal or early human probably knew how to do.
Swords
We should give some thought to swords when we consider blade sharpening. The first swords were probably seen in the Bronze Age, around the 17th century BC. Later, during the Iron Age, blacksmiths discovered that mixing carbon with iron would produce an alloy we call steel. This is the beginning of the steel blades we see today.
How sharp were swords?
We often associate swords with knights. Knights, heavily armored horsemen, began to appear in the Middle Ages, around the 11th century.
When we wonder how sharp their swords were, we need to consider how they used them. They thrusted, that is, jabbed the point into an enemy, they cut, or chopped, and they sliced. Slicing cannot be done with a dull blade, as I discovered in my own kitchen. Knights, therefore, had to have a method of honing their blades at least as good as that with which our own kitchen knives are sharpened.
Centuries of primitive people, and knights on horseback kept their blades sharp, and yet I struggled with the problem of keeping my modern knives sharp. How could that be?
Methods for sharpening knives
Sharpening a blade involves two processes, the sharpening, or grinding an edge, and the honing, which is fine-tuning the edge to make it sharper.
There are really only two methods for sharpening knives, manually or by a machine such as my electric knife sharpener.
Professional knife sharpeners say that the best way to hone a knife is with a stone. To use a stone, you must determine the taper angle for sharpening, that is, how much the blade tapers from thick to thin. You must maintain that taper by angling the blade against the stone.
Any sharpening process on a dull blade involves first grinding the edge, then honing, or the actual sharpening. Using the stone sharpening method, you do both by using different grit.
My struggle to find a sharpening method
I have drawers full of knife sharpening equipment, and I can tell you, that for the average home cook like me, it’s not easy to learn to sharpen knives precisely with a steel or a stone. And yet, for carbon steel knives, it’s best to hone your knives every time you use them. Stainless steel knives can go 2-4 uses before honing. The struggle for me was how to do it.
Questions plagued me. Do I use a whetstone or a dry stone? How do I know the right angle? How much do I take off? And, what if I damaged my knives?
Methods I tried
First, I used a “steel” that came with a set of knives I’d purchased. It’s a rough steel rod with a handle. I really tried to master sharpening my knives with that. As a new home cook, I figured everyone knew how to use one of those because why else would one come with the knives? But the method eluded me. I only managed to dull and nick my knives.
Then I bought a sharpening stone. My first one was a rectangular gray stone. I really never quite figured out where to even place the knife against the stone, or whether I should pour oil or water on it, or use it dry. It sat in the drawer, accusingly unused.
After that, I bought a contraption with the sharpening stone built into a scissors-like handle. The pictures showed someone just sort of slicing a knife into the object in order to sharpen their knives and scissors. I couldn’t get the hang of that either. My knives remained dull.
I purchased three expensive and beautiful knives and although the company representative would drive out to sharpen them for me whenever I called, there was always a sales pitch for purchasing more knives. And there was the guilt factor of making him drive for an hour to spend fifteen minutes sharpening my knives. I bought a cake server and a cheese knife and a vegetable peeler before I stopped calling him.
I decided to use the services of a professional knife sharpener.
Out of desperation, I would wait for the once-a-month Thursday when the knife and scissors sharpener came to the hardware store. I’d carry in my sewing scissors and my favorite knives, and happily pay to have them come back super sharp again.
Having that super-sharp edge for a week or so spoiled me. But when I looked at what it cost to sharpen three of my best knives every month for a year, I invested in my Presto Eversharp electric knife sharpener.
Why I chose the Presto Eversharp Professional
The Presto Eversharp Professional was my choice because it has a 3-stage sharpening process. No, don’t cringe. The whole sharpening process takes only seconds.And it mimics sharpening knives with the stone method. The 3-stage process is the grinding, the honing, and a middle stage that falls between the two.
Since my knives were, at that point, dull enough to slide over a baby’s skin without making a nick, I thought it best to have all 3 options for sharpness.
All electric sharpeners have either 2 or 3 stages, and have different methods of controlling the angle at which the blade is sharpened.
The 2-stage sharpeners usually have the coarse and fine grinds only. I prefer having the option to use the medium fine grind, since I sometimes don’t take the time to sharpen my knives at every meal, and the medium stage gives me a bit more grind than just going directly to the fine grind.
Some electric sharpeners have a toggle, giving you control of the angle of the blade in the machine by hand. I didn’t know enough to use those machines, and, once I made the decision to buy an electric knife sharpener, I wanted the most foolproof method possible.
Using the Presto Eversharp Professional
There is no setup process for the unit. You simply put it down on a smooth, even surface like a countertop or table, then plug it in. There are suction cups on the bottom of the unit with help to hold it steady while it is in operation.
The thickness of your blade determines the setting you select for the angle at which your blade will be sharpened, either thick, medium, or thin. As you select, you can see the orange plastic holders move in or out.
After you select your blade thickness, you turn the machine on. It’s relatively quiet for what it’s about to do. There’s a low hum. I’d expected a machine shop squeal the first time. After all, this machine is designed to grind down steel. Even when it’s sharpening, the sound is not deafening.
You then select the stage at which you start the sharpening. There are three stages, the coarse grind, a medium grind, and the fine grind, or honing stage.
If your blade is very dull, you start at stage 1, the coarse grind. If your knife is somewhat dull, you start with stage 2, the medium grind, and if your knife is only slightly dull, you start at stage 3, the fine grind. If you start at 1 or 2, you move to the next stage and end at 3. Always end at 3.
When I sharpen my knives regularly, that is, each time I use them, I only use stage 3. But if I’ve let them go for a couple of weeks, I start at 2. I rarely use the coarse grind, stage 1 anymore, but I did the first time I sharpened my knives. And I do if my knives start to get dull from my neglect.
Each stage has two openings, for the left side of the blade and for the right side.
You place the blade in the opening with the base at the end away from you and then, with a light touch, slowly draw the knife toward you, lifting up to match the curve of the knife. The first time you sharpen, you may find you use too light a touch, but that’s easily remedied by the second or third try.
Try to maintain the light, even pressure that will cause the knife to smoothly and quickly draw through the slot. Pushing down on the knife will cause the machine to stop. It doesn’t take long to learn the technique.
Once your knife is sharpened, wipe it with a clean, damp cloth to remove the tiny bits of metallic dust that cling to it.
This process took longer for me to describe than it will take you to do it.
Serrated knives
Sharpening serrated blades without an electric knife sharpener can involve one of several methods, the most meticulous involving dowel rods and sandpaper. I was not prepared to do that, and in fact, my serrated blades were, except for one, so inexpensive, that the manufacturer probably would have laughed at me if I’d requested a sharpening.
Good chefs learn to sharpen knives by using a steel, and most can sharpen a serrated knife with a steel just as they do their other kitchen knives. Since I hadn’t learned to use the steel to sharpen my straight-edge knives, I doubted my ability to use a steel for serrated knives.
The professional knife sharpener at the hardware store sharpened them for me, but warned that continued sharpening might damage the curve.
“Ha,” I thought. “Continued use of a dull serrated knife could cause it to be trashed!”
Sharpening serrated knives with the Presto Eversharp
You can sharpen serrated blades with the Presto Eversharp. Be warned, however, that the honing process will eventually destroy the scoop of the curves on the serrated knives, and you will end up with a regular straight knife blade. If you have very expensive serrated knives, you will either want to learn to sharpen them by hand, or send them back to the manufacturer to be sharpened.
But the Presto Eversharp Professional sharpens my serrated knives, my old, very old, very…well, cheap serrated knives to a super sharp edge. Slicing through a tomato after sharpening my ancient serrated knife is like slicing through softened butter – I almost need no more pressure than to touch the knife to the tomato, and it glides through.
Yes, I know my knives won’t keep the serrated edge forever, but before my Eversharp, they sat at the back of the drawer because they were so dull, I didn’t want to use them. And looking at them today, after many, many sharpenings, I can’t tell by looking at them that they have lost even an iota of their curve.
Advantages and drawbacks to using an electric knife sharpener
There are drawbacks to using an electric knife sharpener like my Eversharp. For one, if you’re not used to using very sharp knives, you can slice your fingers up quite quickly. If you’ve ever watched one of those chef shows on television, you can see at least one contestant during the series slicing the tip off a finger. Good cooks like a sharp edge.
The instructions on the Eversharp say not to test the newly sharpened blade by running your thumb against it. Why did that make me want to do it? Bandaid!
Using dull knives
Using a dull knife for such a long time, I had developed a habit of putting a great deal of pressure on my knives when slicing root vegetables like carrots or turnips. I would hold the vegetable in my left hand and press firmly against it with the knife in my right. Sometimes I rested the heel of my left hand on the part of the blade near the tip while drawing the knife down with my right so that I could put even more pressure on the blade.
Sometimes, the vegetable would fly out on either side, and I’d have to hunt down the pieces.
I had to end those bad habits quickly, because my newly sharpened bladez would slice through so fast, I sometimes nicked my fingers. OK, often at first. My partner grew used to hearing “ouch” and other more lethal, exclamations from the kitchen.
Today, I slice by moving the vegetable, not the knife. I can do that because my knives are often sharpened before preparing a meal. The knife works like a guillotine as I move the vegetable into place, my fingers far from the sharp edge.
Slicing through raw meat is no longer a chore. I can buy a whole chicken, cut it into parts and even debone it with no trouble at all because my knives are so sharp. Cooked meat, like slicing a steak, is a breeze.
And that freshly baked bread? The moment a loaf is cool, my ancient, but now very sharp serrated knife floats through it, making a beautiful, even cut.
Making the choice: manual sharpening
Is an electric knife sharpener preferable to a manual method, either a steel or a stone? I believe the answer is depends on what you’re comfortable with and your preference.
Certainly, a manual method gives you a lot more control over the process, being able to take off a small bit and check your work, or knowing exactly what is happening because the process is in your own hands, not that of a machine.
However, manual sharpening requires more time, and it requires learning a skill. Like any skill, you must practice becoming proficient.
Making the choice: using an electric sharpener
Sharpening with an electric knife sharpener is fast, and the learning curve is so smooth, it’s almost no curve at all.
Electric sharpeners are not small. They can range from about 6 inches long to over a foot long, and about 4-6 inches deep. They must be taken out and put away again. A stone or steel takes up inches in your drawer and can be taken out in an instant. It can seem like a chore to get the electric knife sharpener, plug it in, then put the machine away again. However, for me, that whole process is less cumbersome than using a manual method.
And we come back to the joy of having an electric knife sharpener. Taking it out and setting it up gives me the pleasure of knowing I have the ability to use razor-sharp blades at my whim.
Improvements for the Eversharp
If there is one thing I would change on my Eversharp, it would be the length of the cord. It’s about a 3-foot cord, and that works fine if I put it on the counter near the plug. But that’s not where I would like it to be because the food processor is there, or the blender. I’d like to keep it on the island instead of making room for it every time. But that’s a small complaint.
Overall, I am still very pleased with my decision, and do not regret buying an electric knife sharpener, or this particular knife sharpener, after years of using it.
Conclusion
I can’t brag that I’m like the chefs on television, deftly moving their knives against their steels at the perfect angle.
I can’t talk with any conviction about using wet or dry sharpening stones.
But I secretly grin when I’m at the family holiday get-together and my brother-in-law gets out his electric knife to saw through the roast turkey.
“I could have done that in seconds,” I think to myself. And my slices would have been falling from the bone like petals from a flower. It makes me smile, just thinking about it.
REFERENCES:
- Serious Eats on Knife Sharpening – It’s an excellent guide even though it was written in 2010.
- eGullet on knife sharpening
- Bob Kramer on Sharpening Knives
- Some if my first pocket knives were Buck Knives. They’re a great company and they have a guide to knife sharpening.
- Buck also has information on types of sharpeners that I found helpful when writing this guide.
- I love the Edge Pro System! Here are their tips to knife sharpening.
- Here is a guide called, How to Sharpen Your Knives – Learn the Skills Necessary to Hone and Stone Your Knives, from Zwilling J.A. Henckels
- The Hunting.Net Forum on the Best Knife Sharpeners on the Market. It’s a bit dated but there is great discussion by people that are REALLY into knives.
- Chowhound the forum has a dated, yet informative thread about knife sharpeners. It goes back to 2006, but if you’re into chasing facts deep into the rabbit hole you may like the discussion.